DIY Family Costume: Alien Abduction

What is your favorite holiday? Why is it your favorite?
Halloween, hands down. My most popular blog posts are my DIY family costumes, like lifecycle of a butterfly, deep sea creatures, and Elvis jumpsuit costume. A picture from my Hamilton family costume post is going to be published in a textbook in Africa(!!!). I even stretch out Halloween a little longer by going to NYC Comic Con and the renaissance faire for more costumes.
This past Halloween, I made the mistake of shopping for Halloween costume ideas on Pinterest with my five year old. I figured there wasn’t any challenge I wasn’t willing to take.
When he chose to be abducted by an alien in a UFO, I knew I could do it. I’m an artist, a maker, a creative! …but I’m no engineer. There was some physics involved that I hadn’t considered, and it was a real challenge.
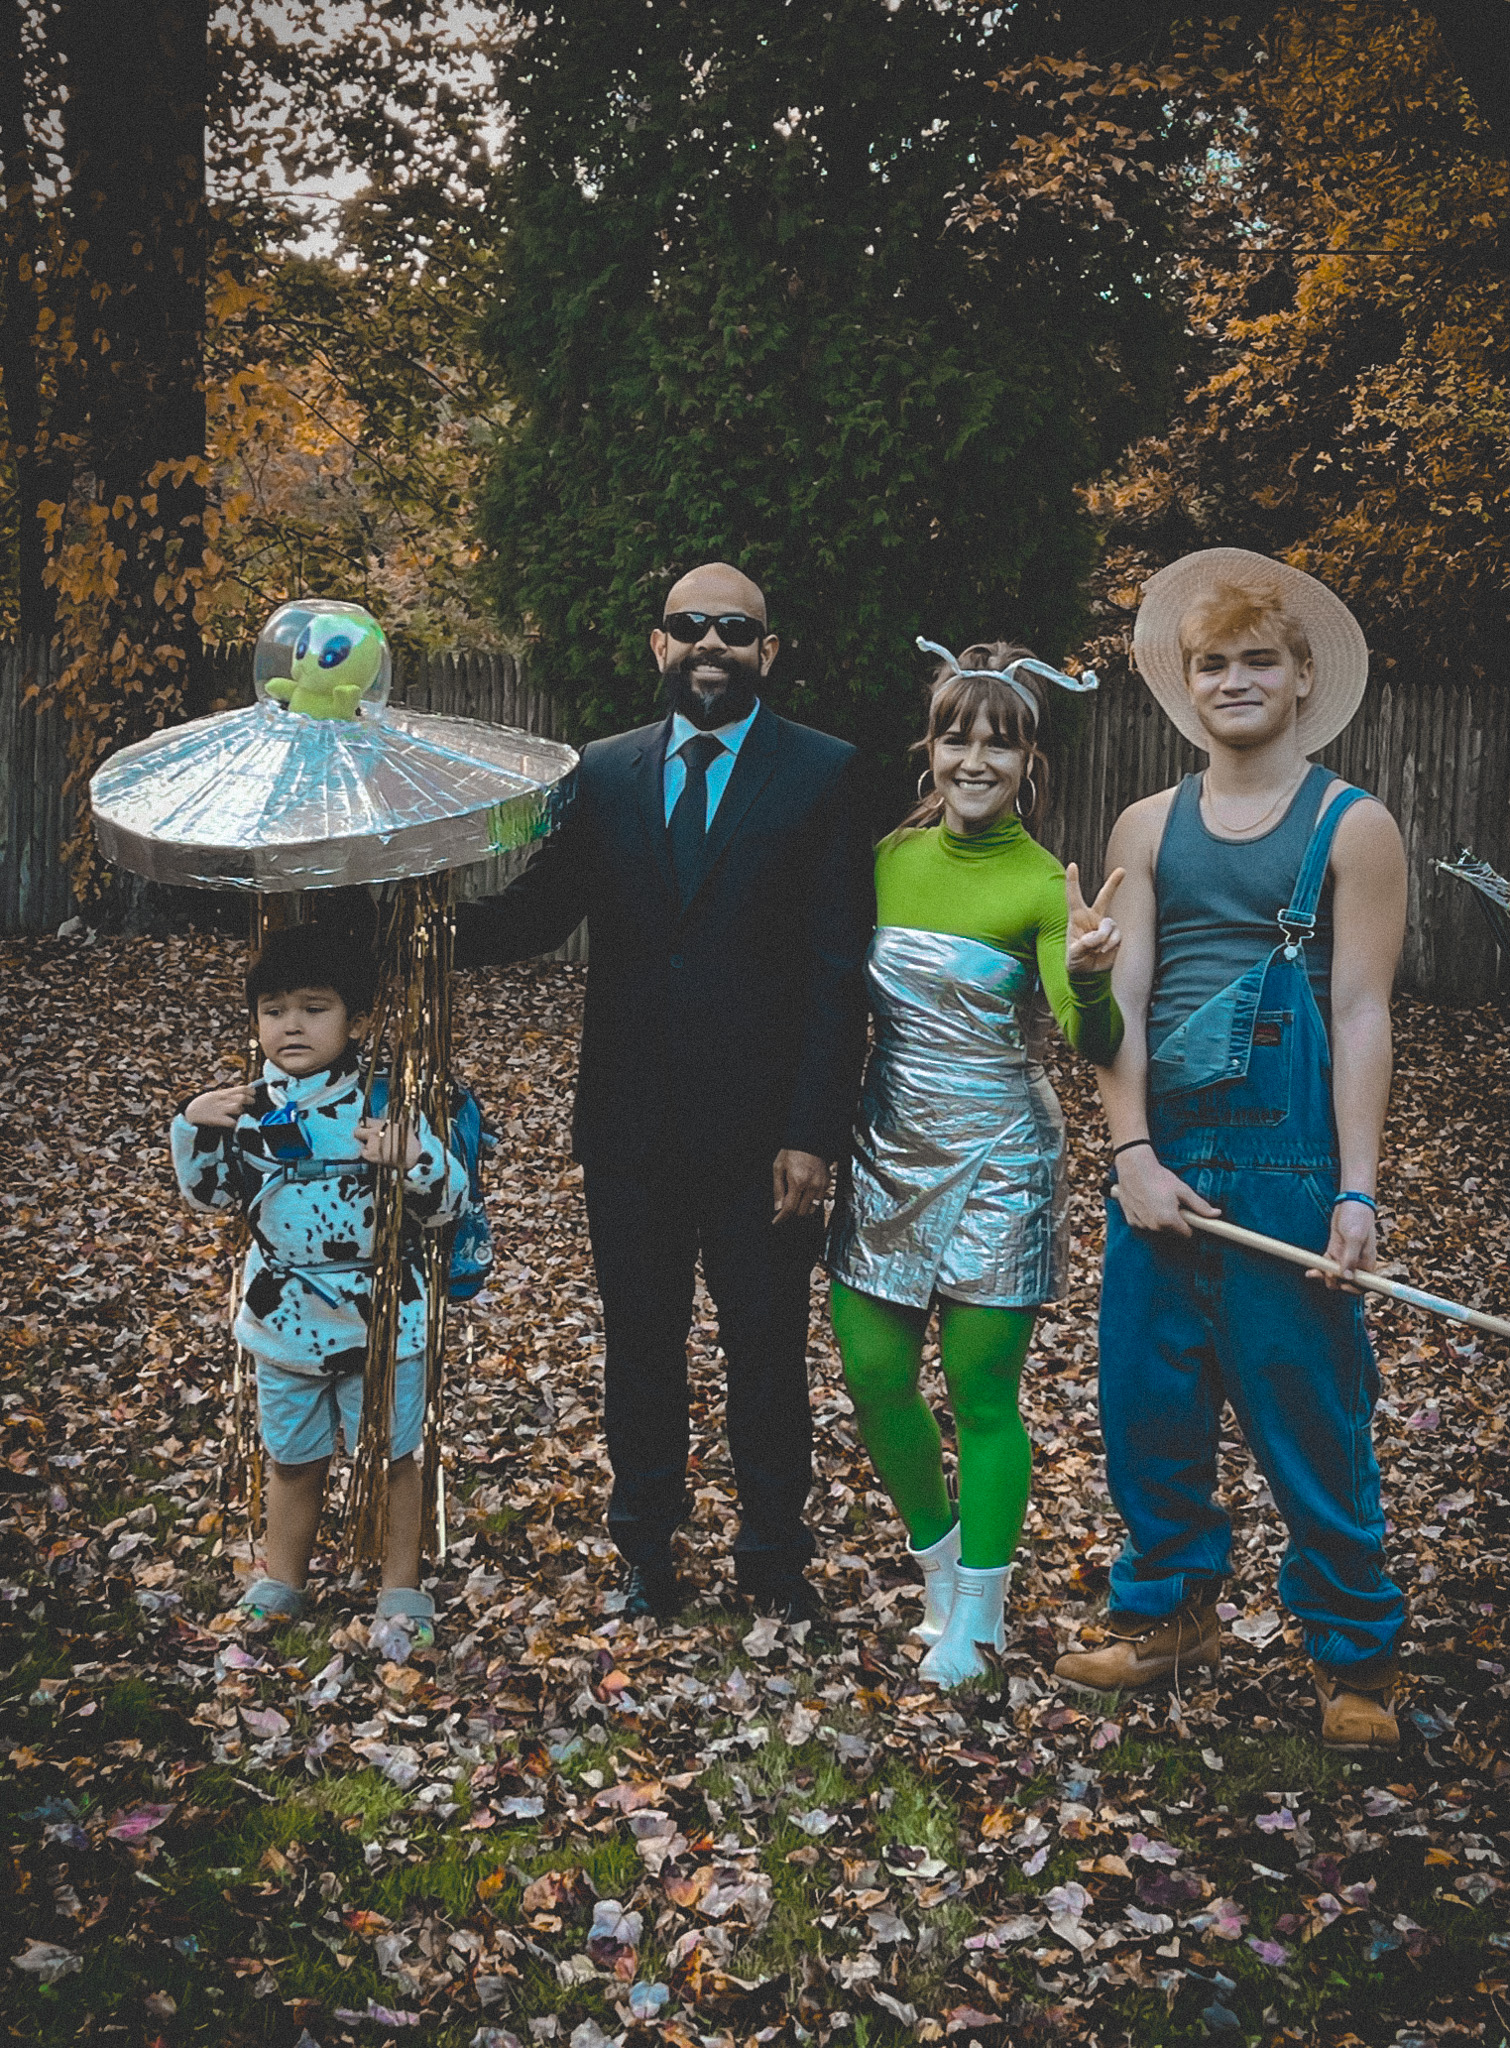
Inspiration for a DIY Alien Cow Abduction Family Costume
All creation starts with inspiration and I won’t gatekeep mine. This is the image that inspired my son to be abducted by aliens:

Jessica N. Turner’s tutorial was instrumental in creating this!
DIY UFO Abduction Costume
Supplies:
- very large cardboard box
- duct tape
- aluminum foil tape
- clear plastic bowl
- stuffed alien figure
- pvc pipe
- saw to cut the pvc
- battery-powered LED lights, batteries
- backpack
- small box to fit in the backpack
- spray insulation foam
- scissors and/or Xacto blade
- hot glue gun, sticks
- tinsel foil fringe party decoration
Steps:
01. From the cardboard, cut out two circles, slightly larger than what you intend the overall size of the UFO will be.
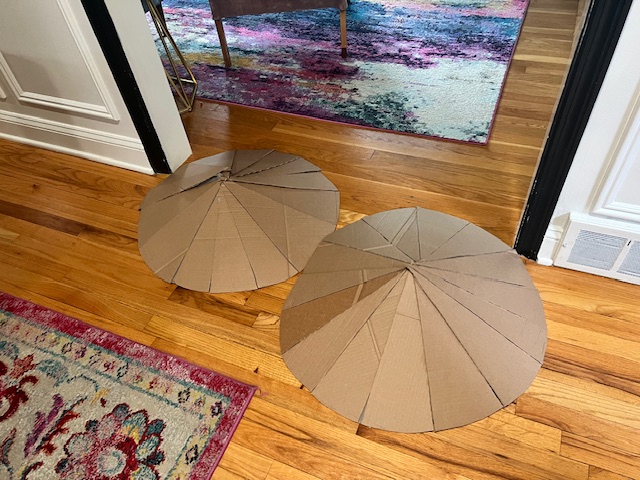
2. Cut each circle into many triangles. Mine had about 16 triangles per circle.
3. Duct tape the triangles for one circle together, abutted at the bottom but as you get closer to the point of the triangle, each should overlap. This overlap will create a cone shape similar to that of a sedge hat.
4. Repeat for the second circle. You should have two shapes like this:
5. In one circle, cut out the center hole where the alien will be seen. The opening for the alien should be smaller than the opening for the clear plastic bowl that will be used on top.
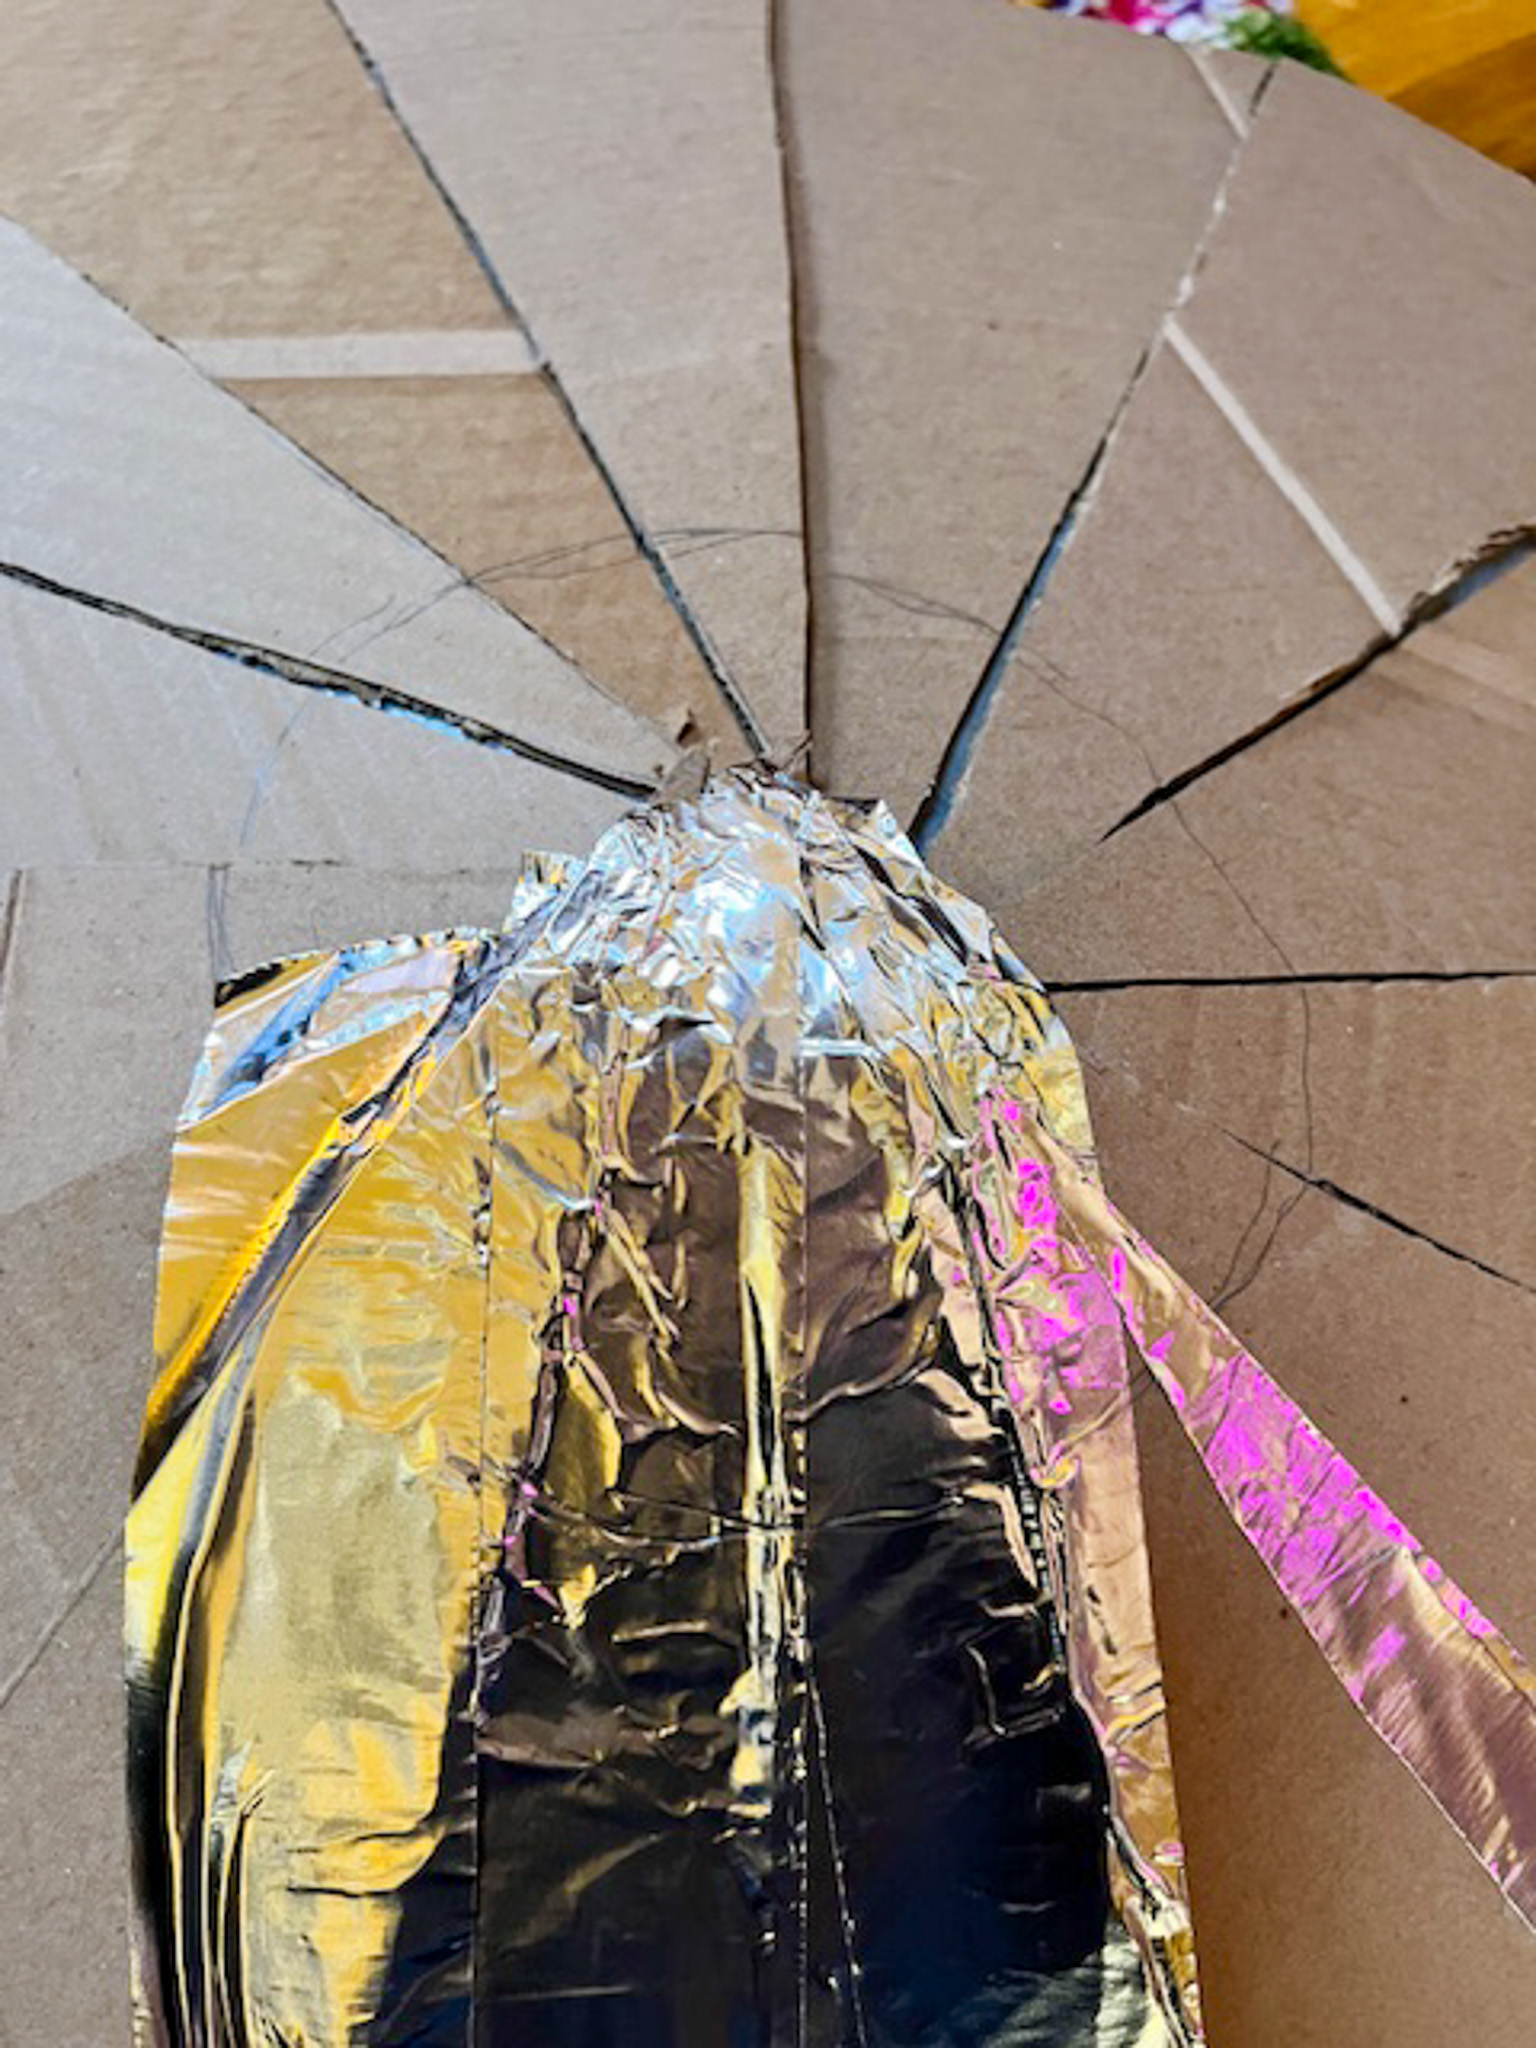
6. Cut one rectangular shape of cardboard that is the length of the perimeter of the circles and tape on to the circle with the hole.
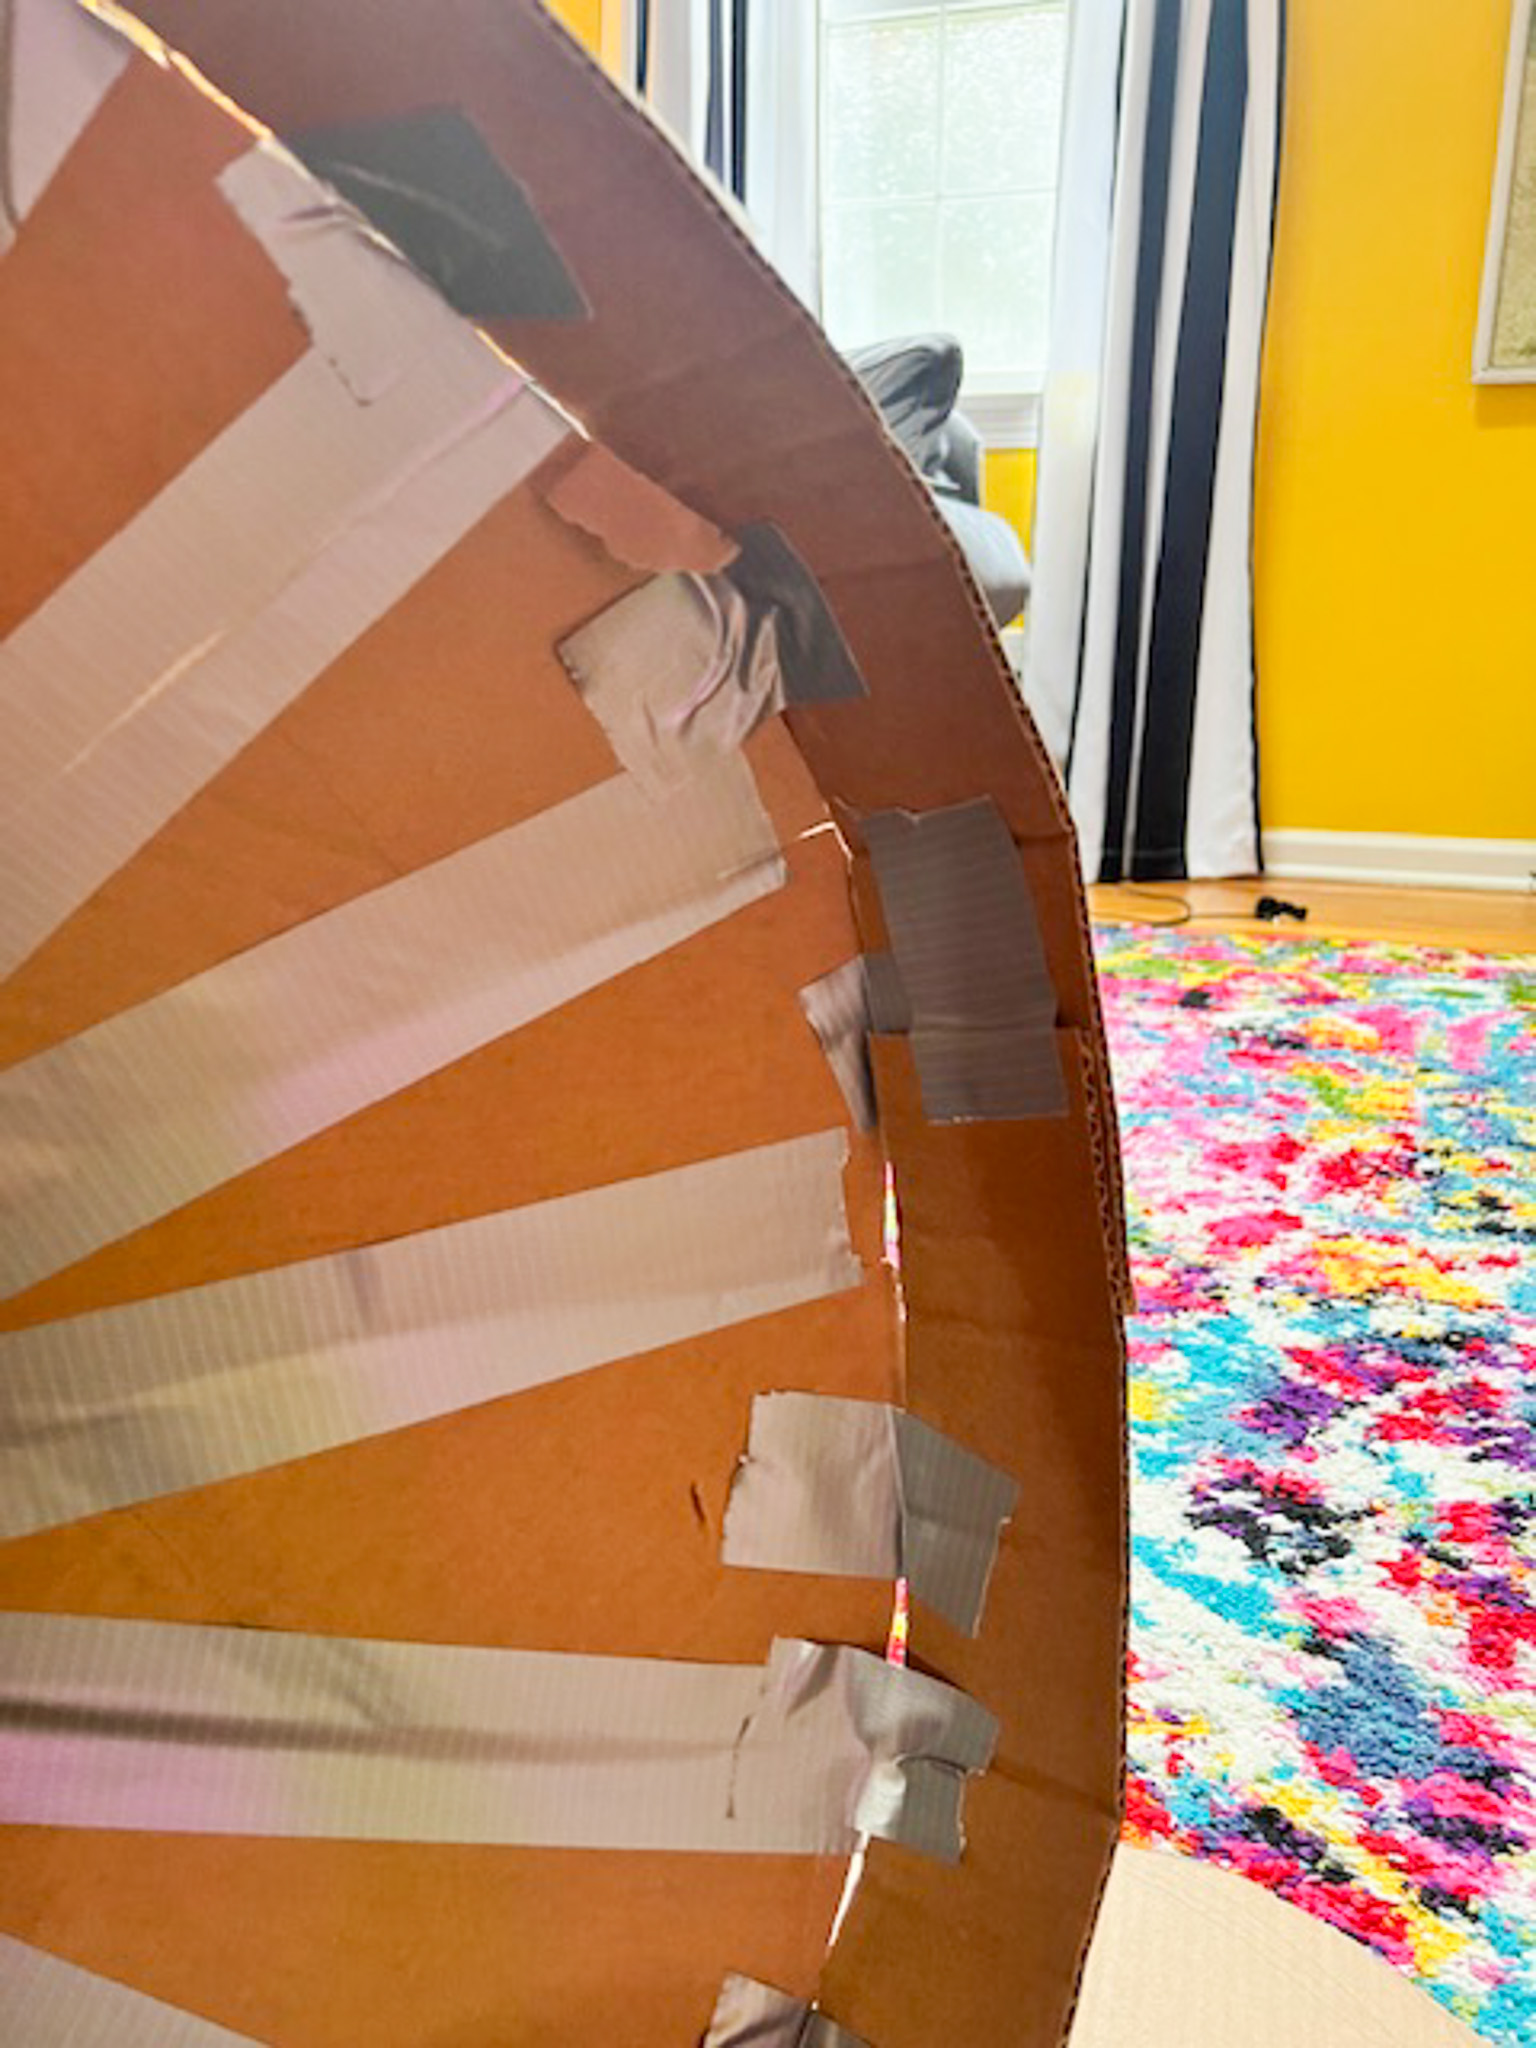
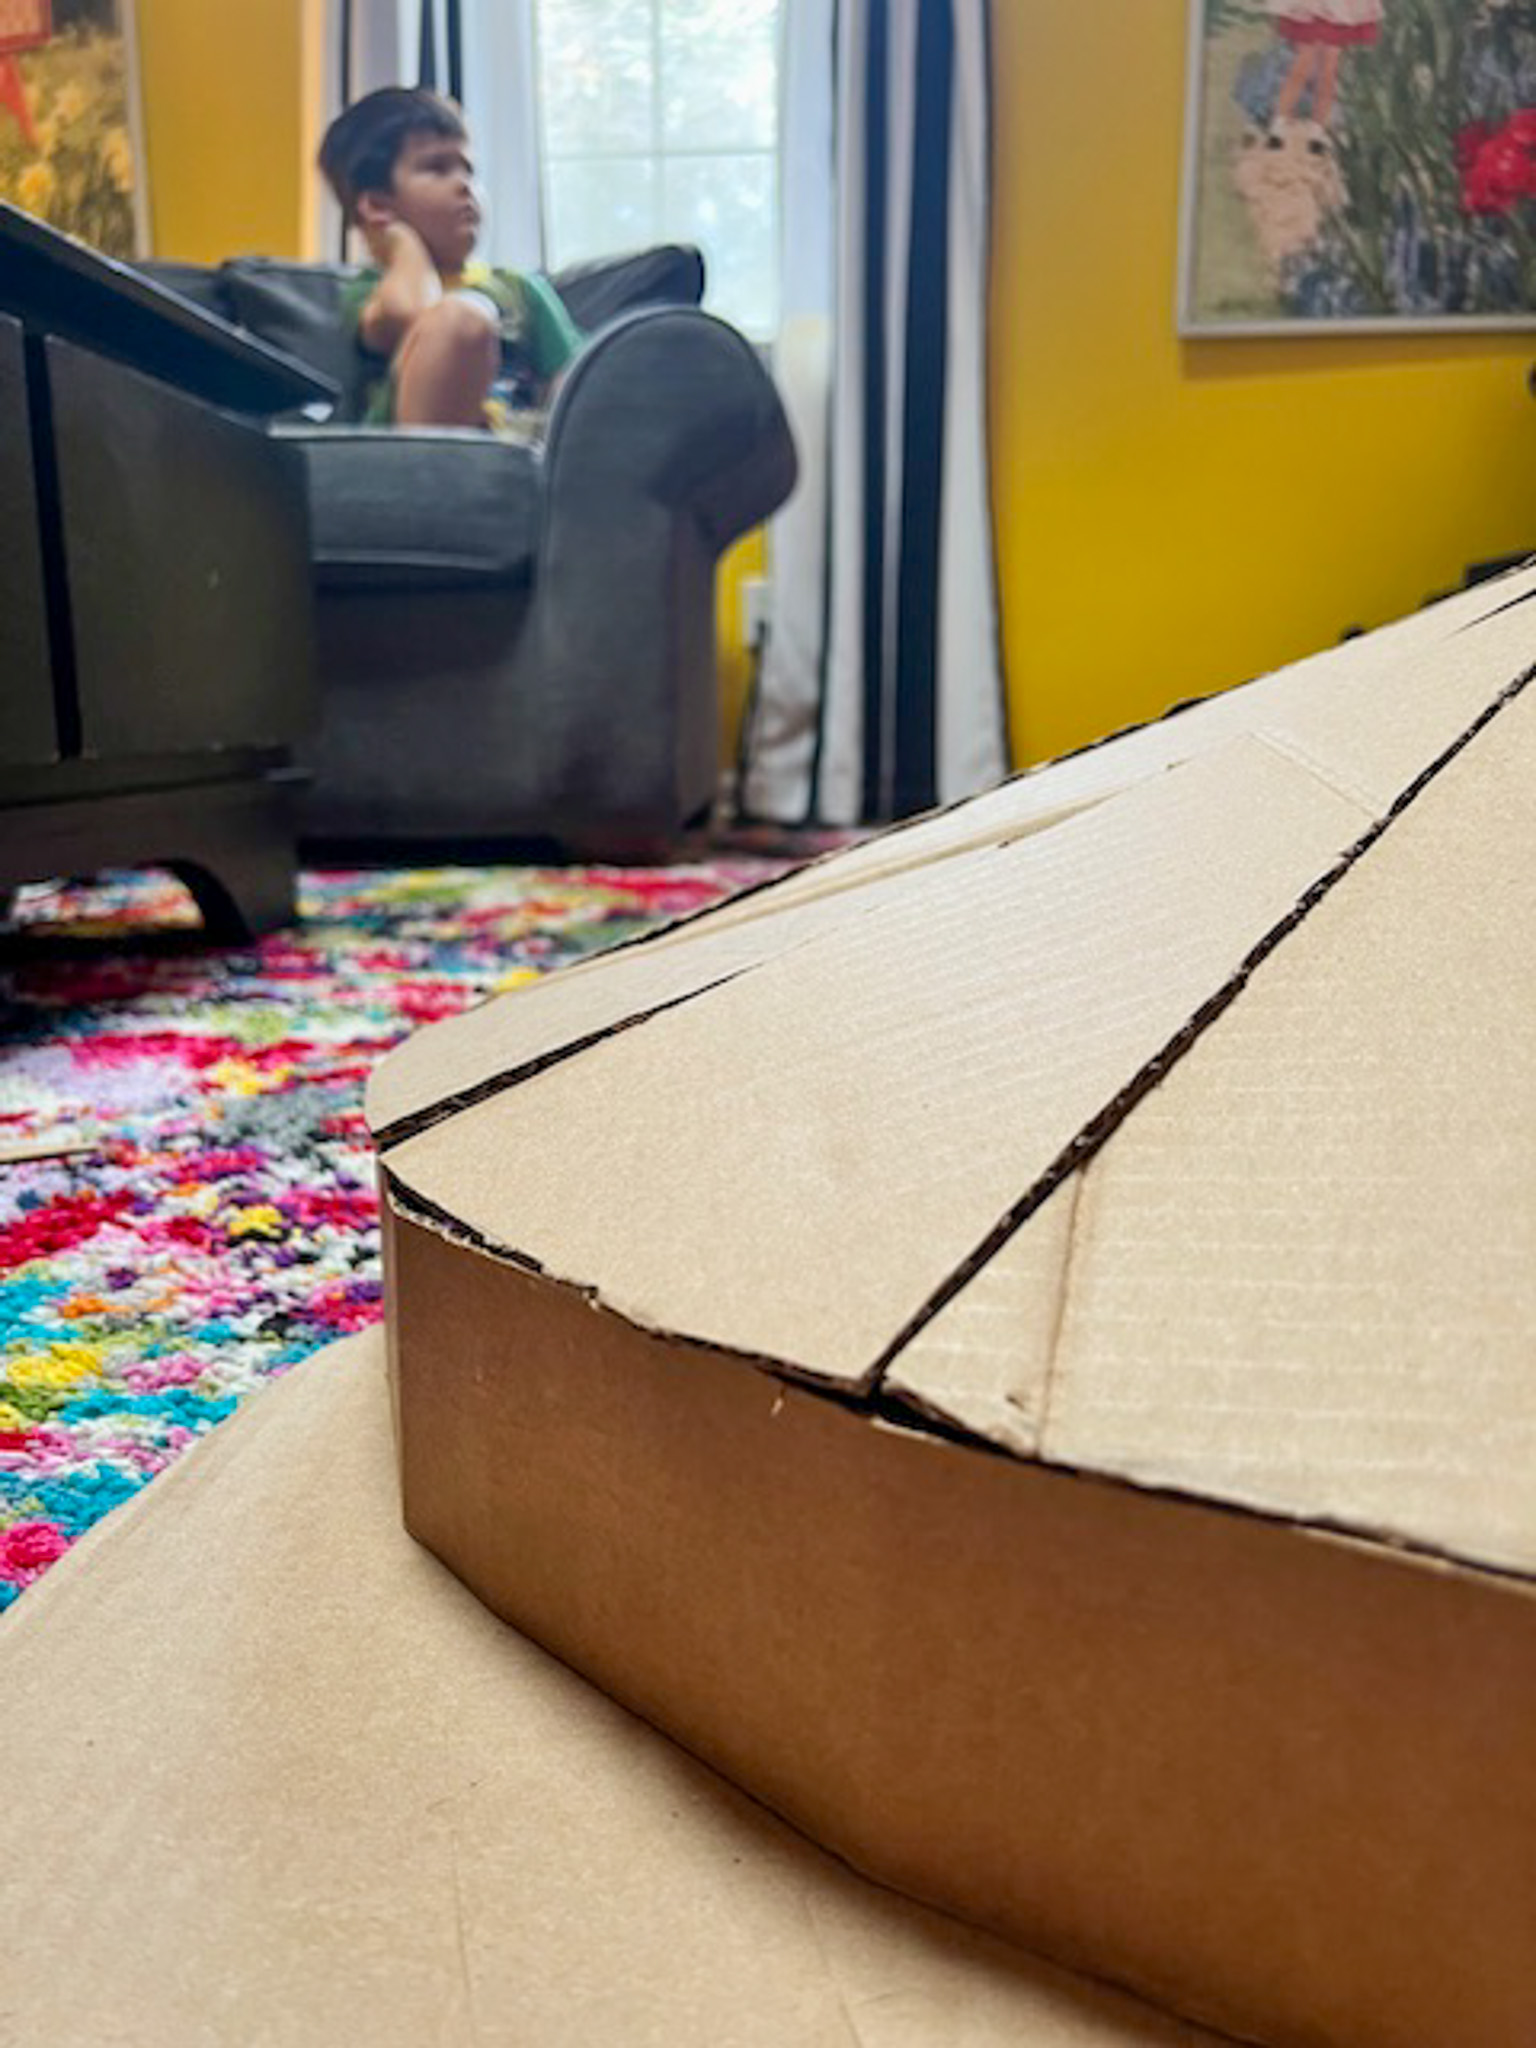
7. Cover the top of each cone with the aluminum tape. The linked tutorial above used spray paint, but this is my third year working with recycled cardboard costumes. I thought the moisture of the paint would take away from the integrity of the build, while covering it in aluminum tape would reinforce the structure.
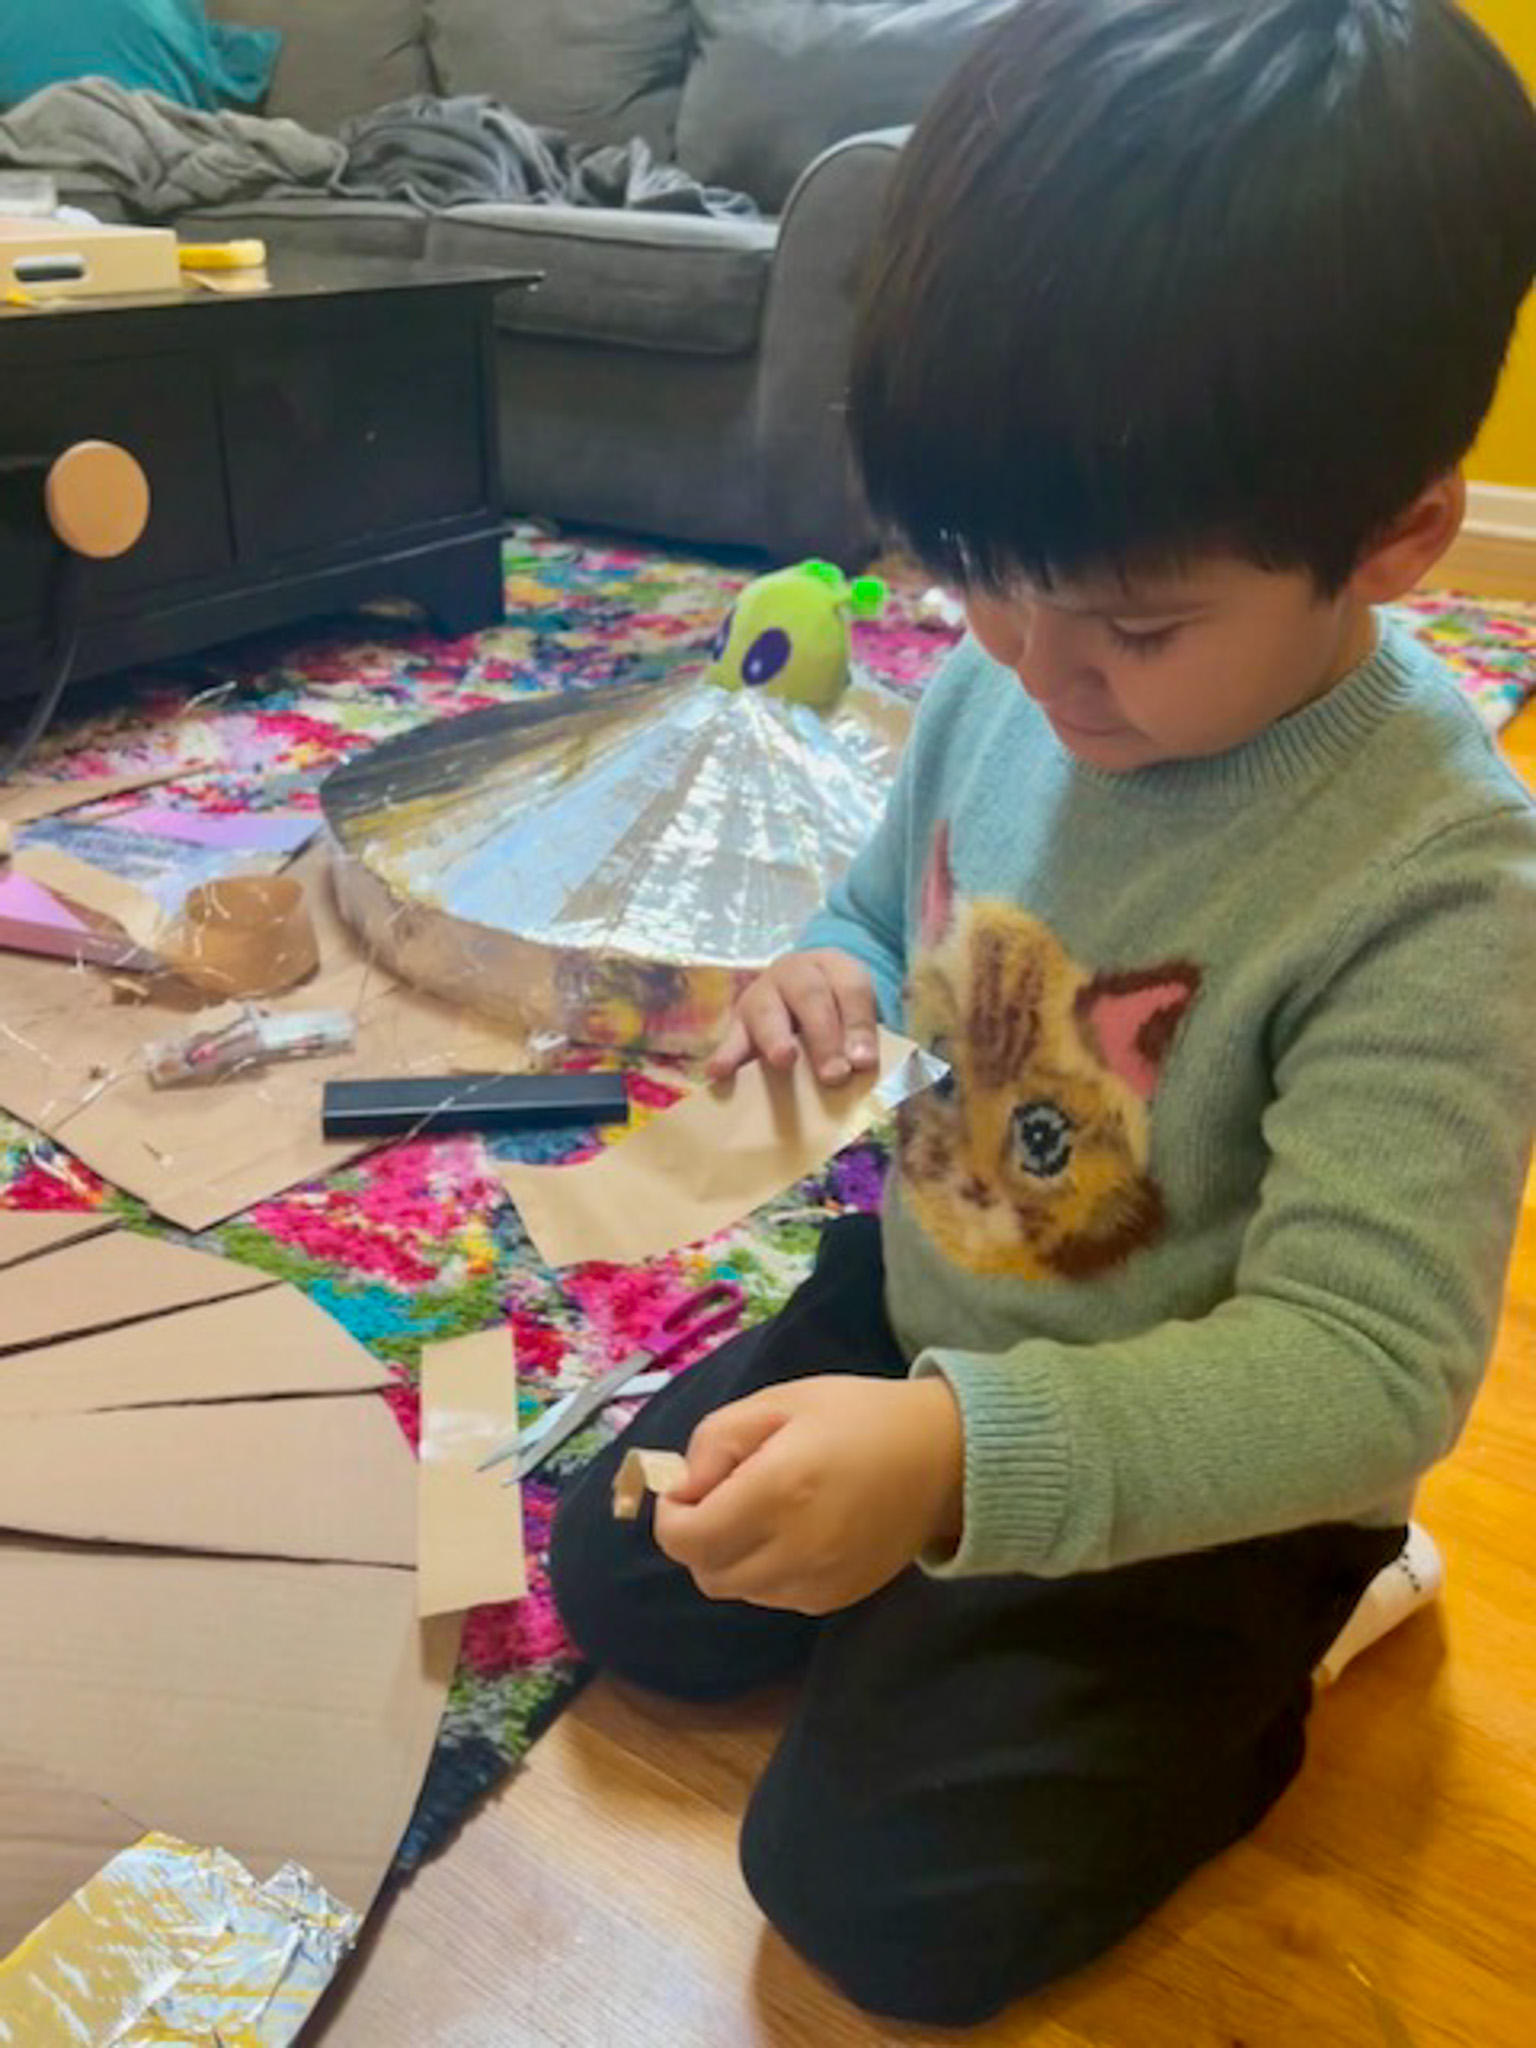
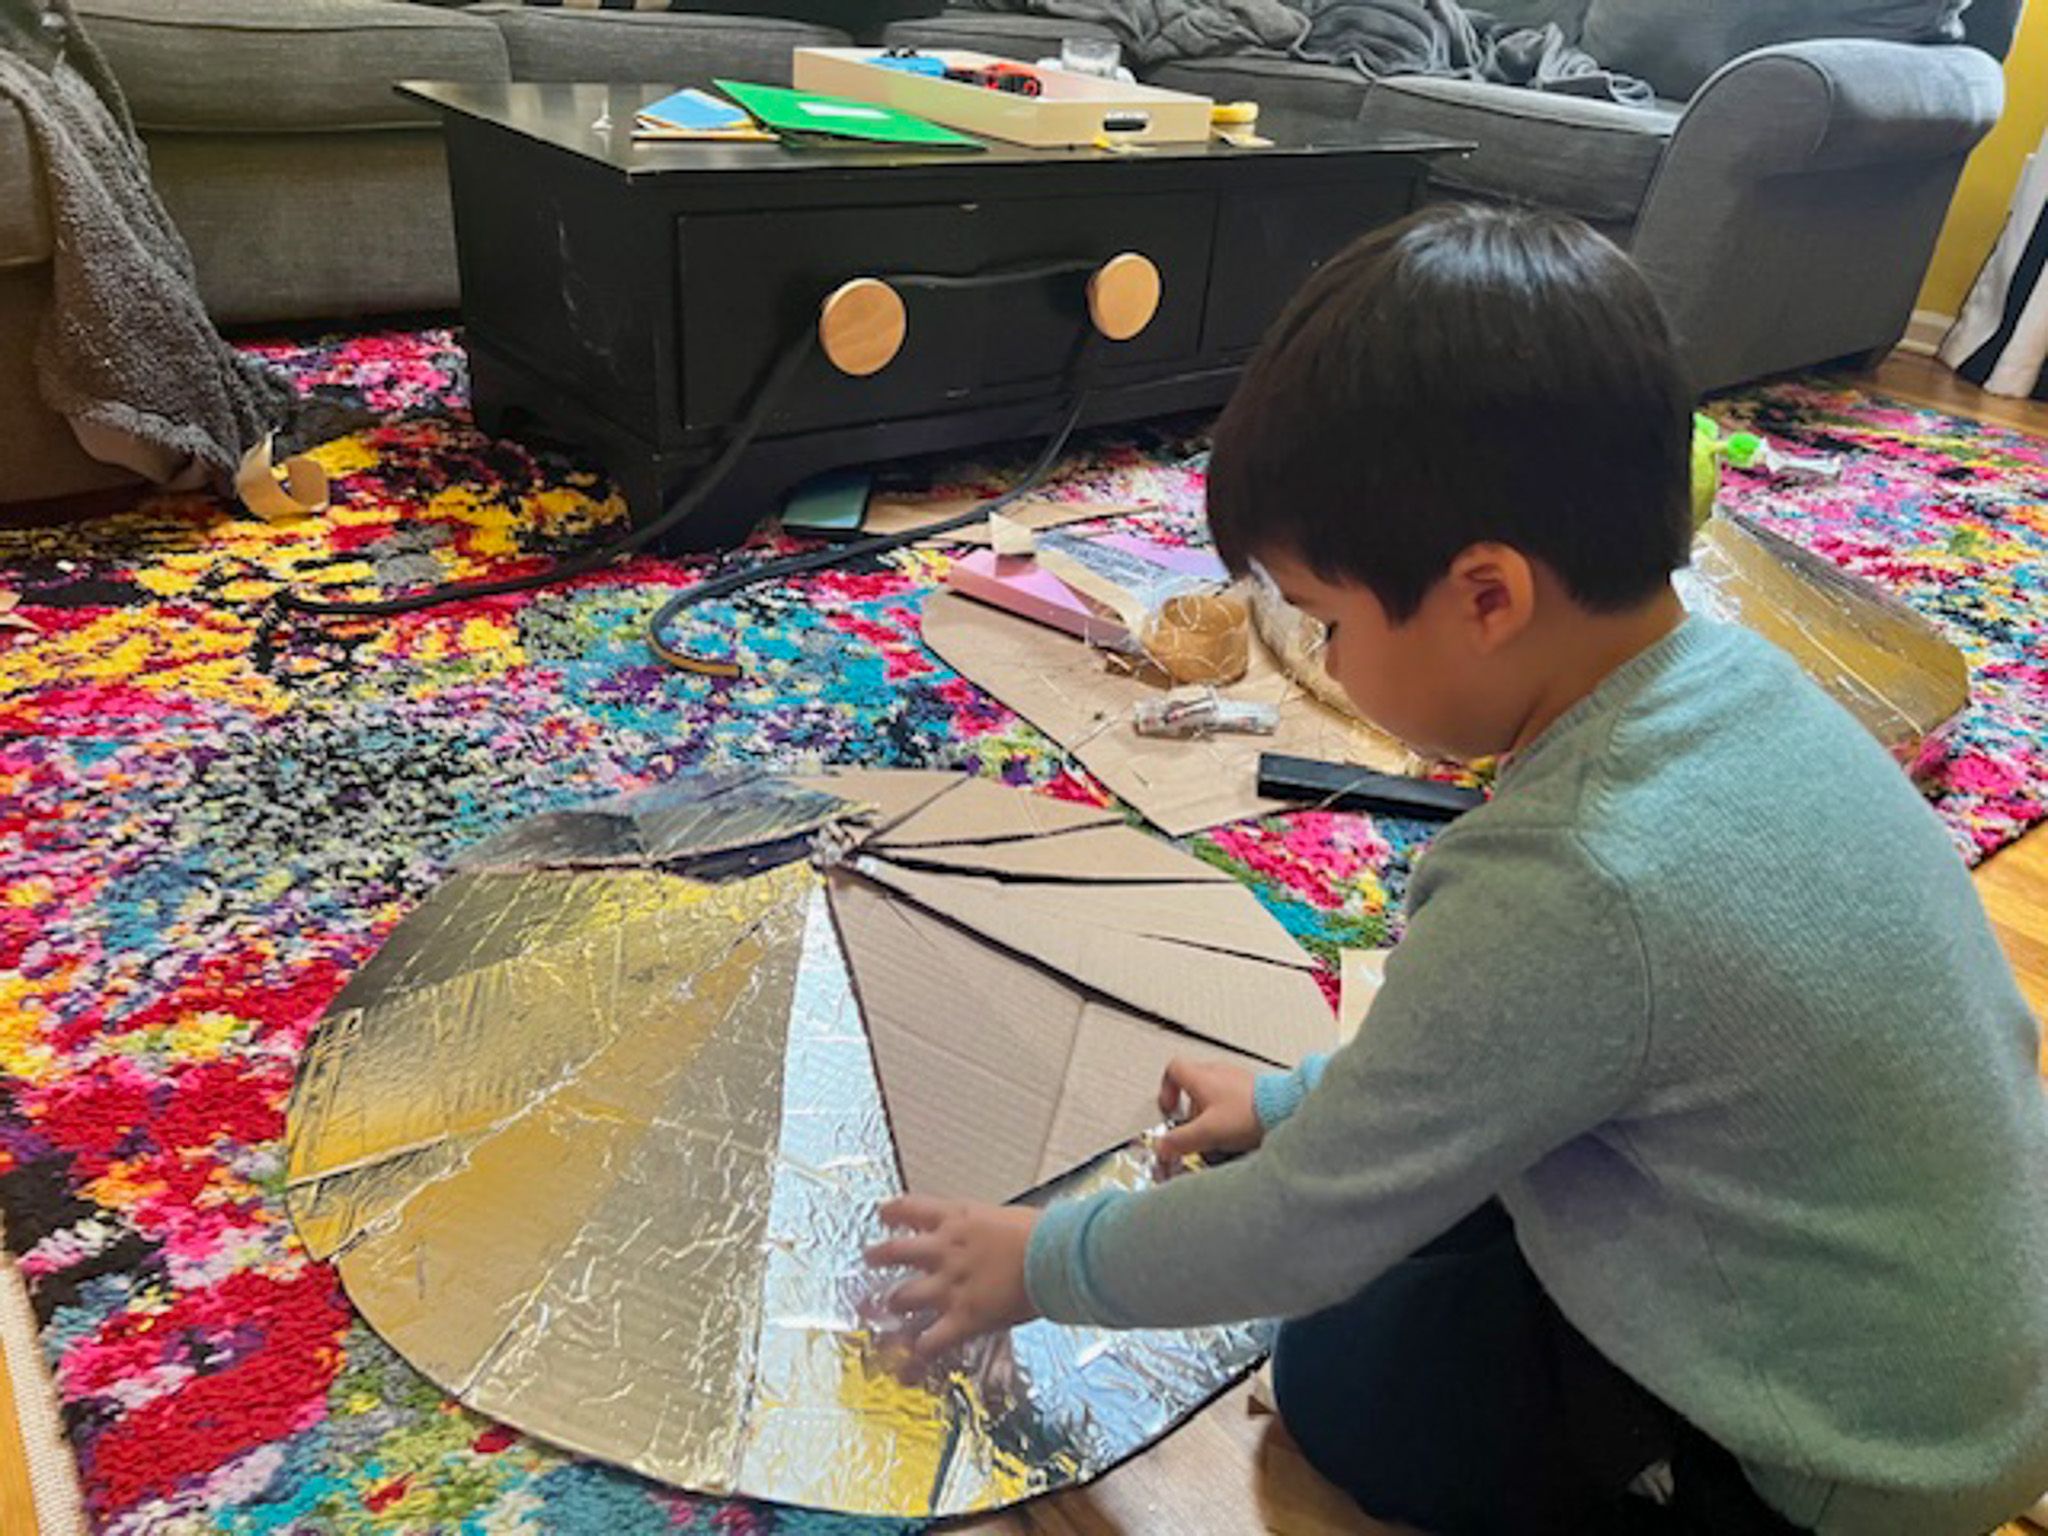
8. Step away from that structure for a moment. Find that small cardboard box that’ll fill the inside of a backpack. Turn it on its side, and create two holes the same width as the pvc pipe. Make sure you can slide the pipe in each and its the right size. Seal up the box real good with duct tape.
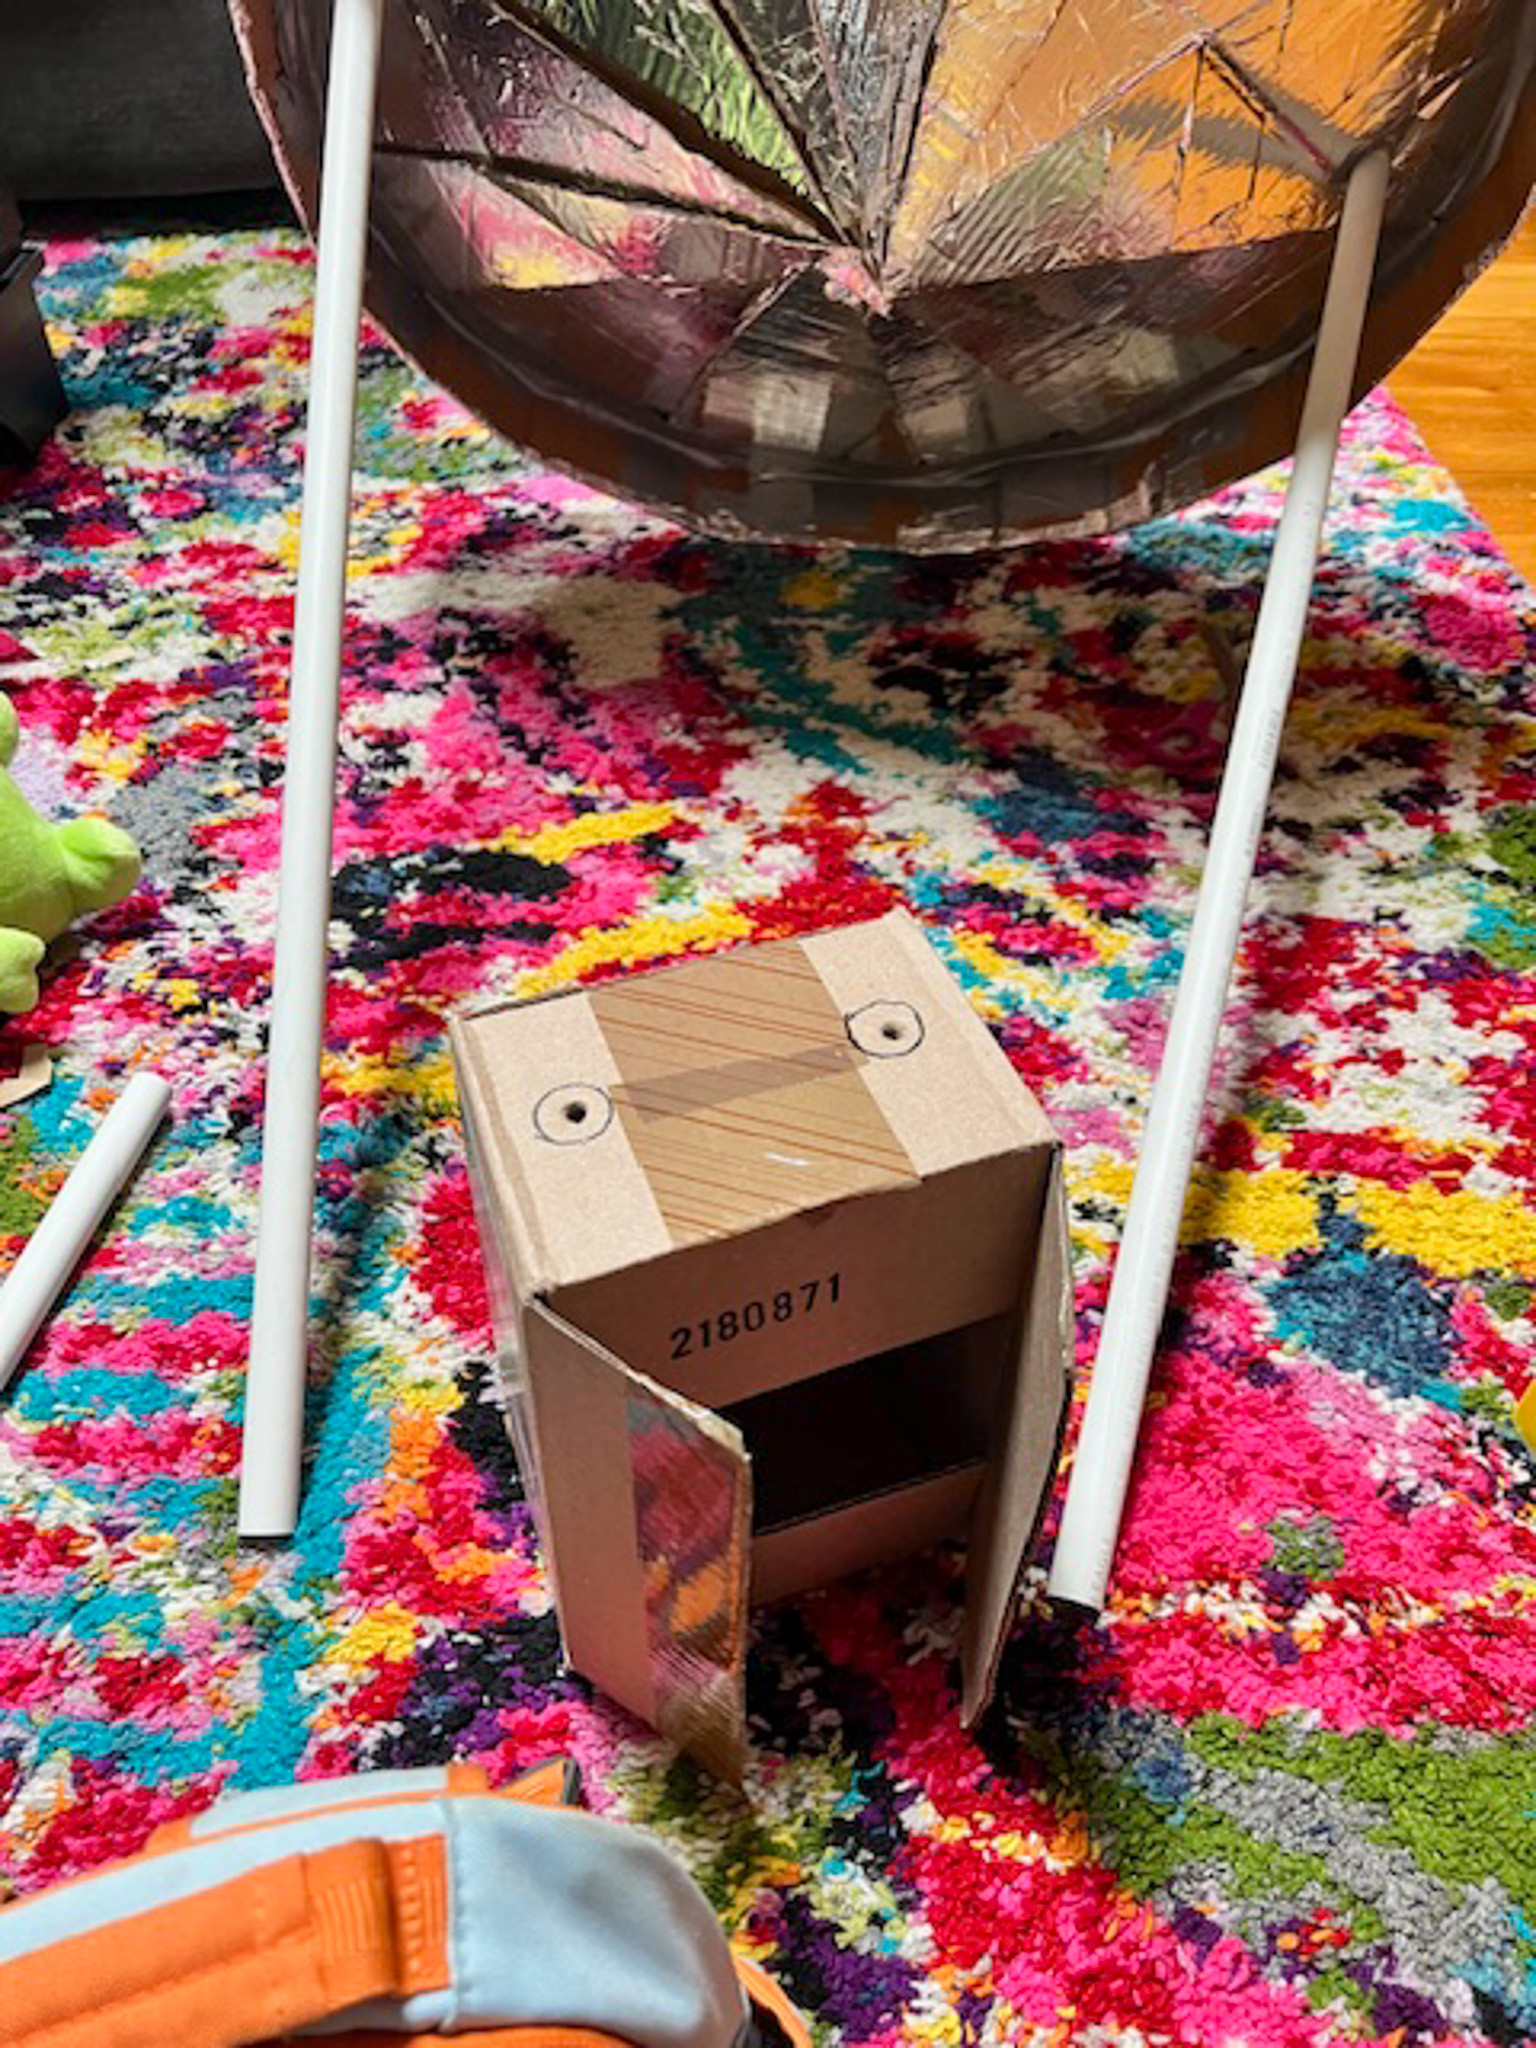
Follow my instructions so you won’t have to do things twice. It’s too late for me.
9. Decide how tall you want the pipe should be. It should be just the right height so that it will reach the bottom of the backpack and hold the UFO above the head with a bit of room to spare. The pipe will need to go through the bottom cone and support the top. Cut the PVC with a hand saw.
10. Spray insulation foam in the box, according to the instructions. Don’t fill it all the way to the top–the whole point of the junk is that it expands and hardens. fill it almost there and put those pipes in, straight up and down. Let harden.
11. Once you’ve got your base box good and sturdy, use the pvc pipes as a guide to trace where you should cut two small holes in the bottom cone. Stab a small hole in the center where the holes will be, and cut outward to the perimeter of what you traced, rather than cutting out the whole entirely. Those small slits can help support and give a tighter hug to the pipe.
12. Place the pipes through the bottom cone, with enough extra sticking out of the top to reach the other cone when it is taped on.
13. Tape the pipe in place on the cone, then use Spray foam insulation all around that to get it nice and sturdy. Let dry. Add more as necessary.
14. Tape on the top cone to the bottom.
15.Use hot glue to adhere LED battery powered lights. We used the same ones from our jellyfish costume the year prior, otherwise you can likely get some with adhesive backing. Place them so that you can have access to the battery pack without it being visible. I placed mine in the undercarriage on the back.
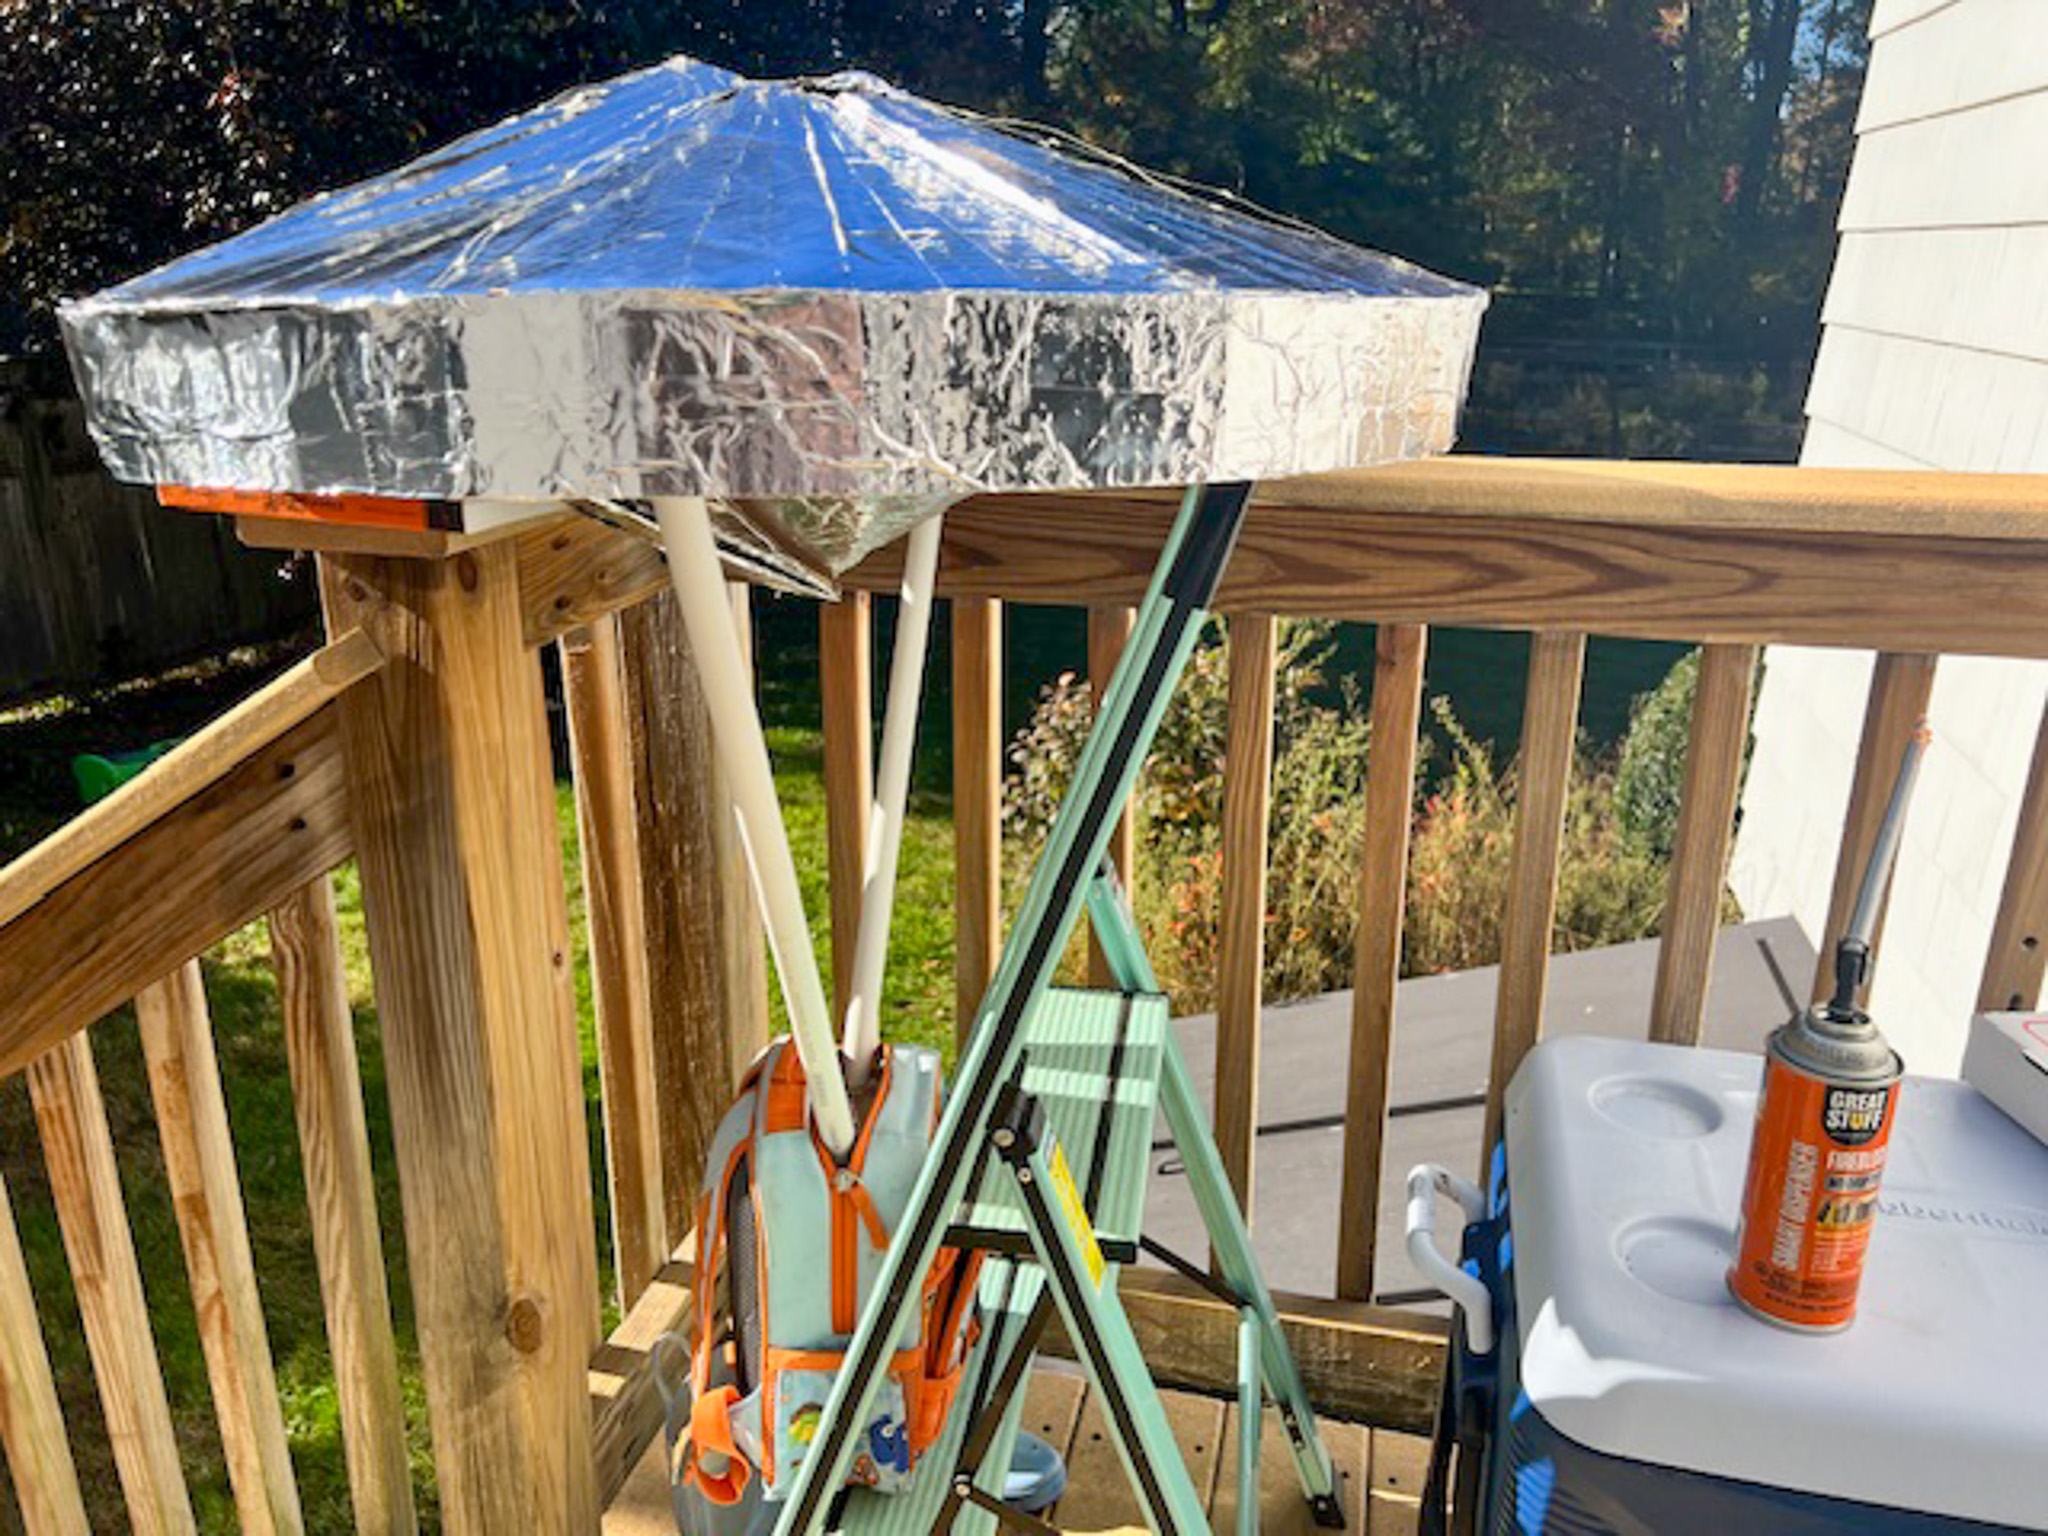
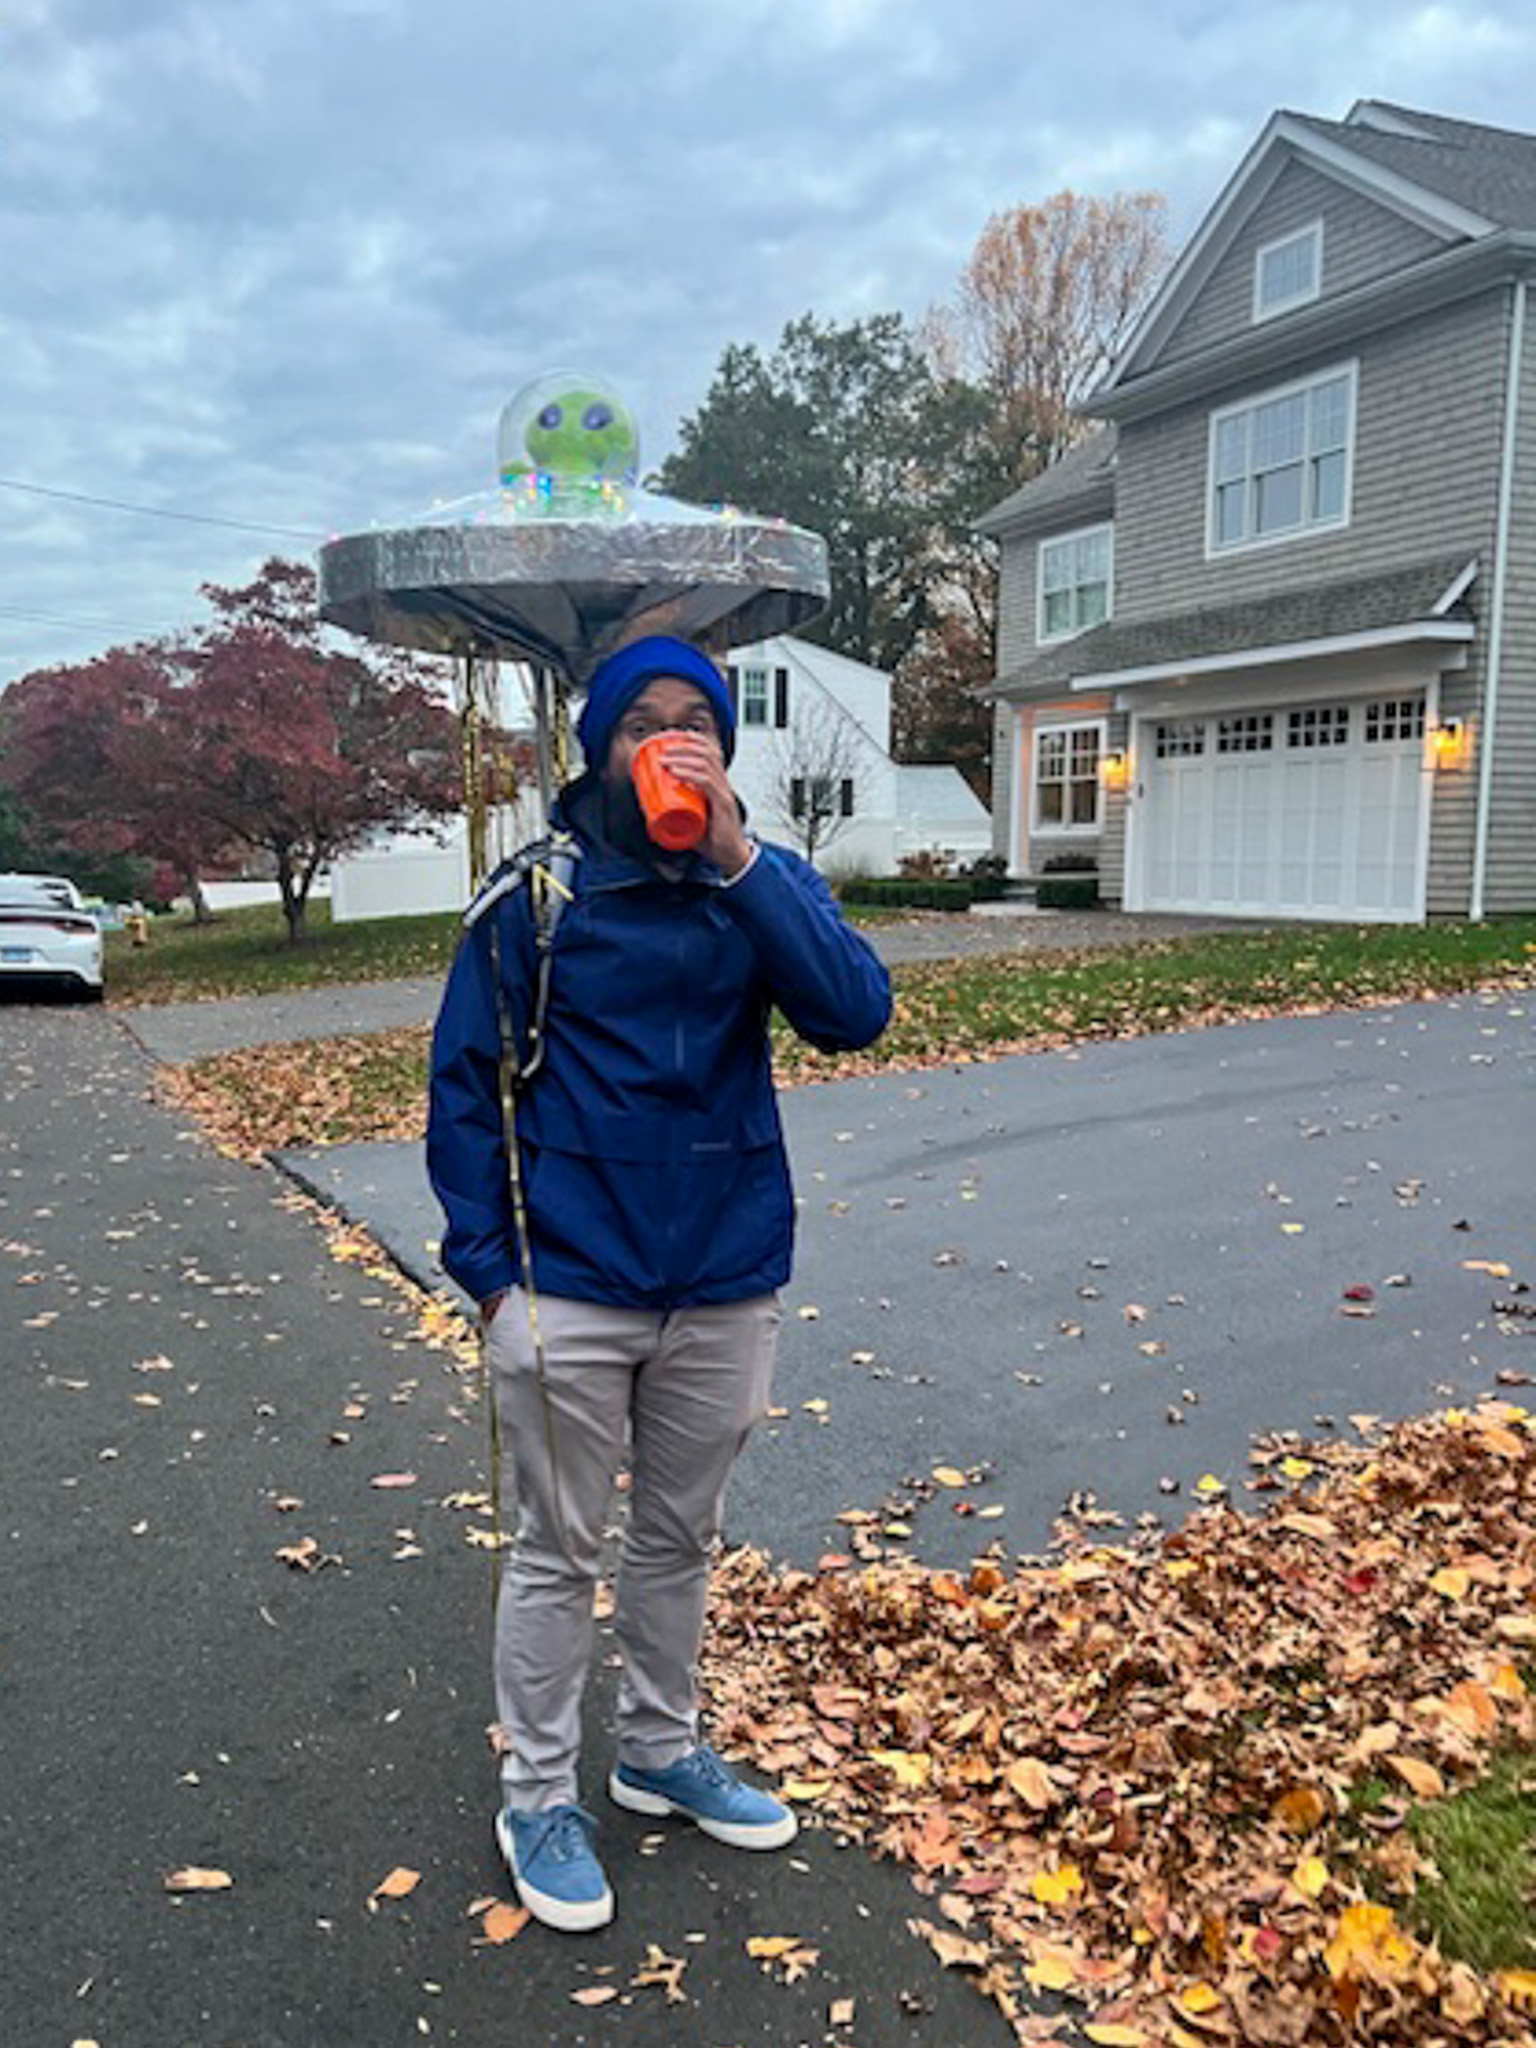
16. Insert your alien, and hot glue your plastic bowl on top.
17. Cut your tinsel. Be aware of the length–you want it to appear to be “beams” like the child is being abducted, but you don’t want it to be a trip hazard.
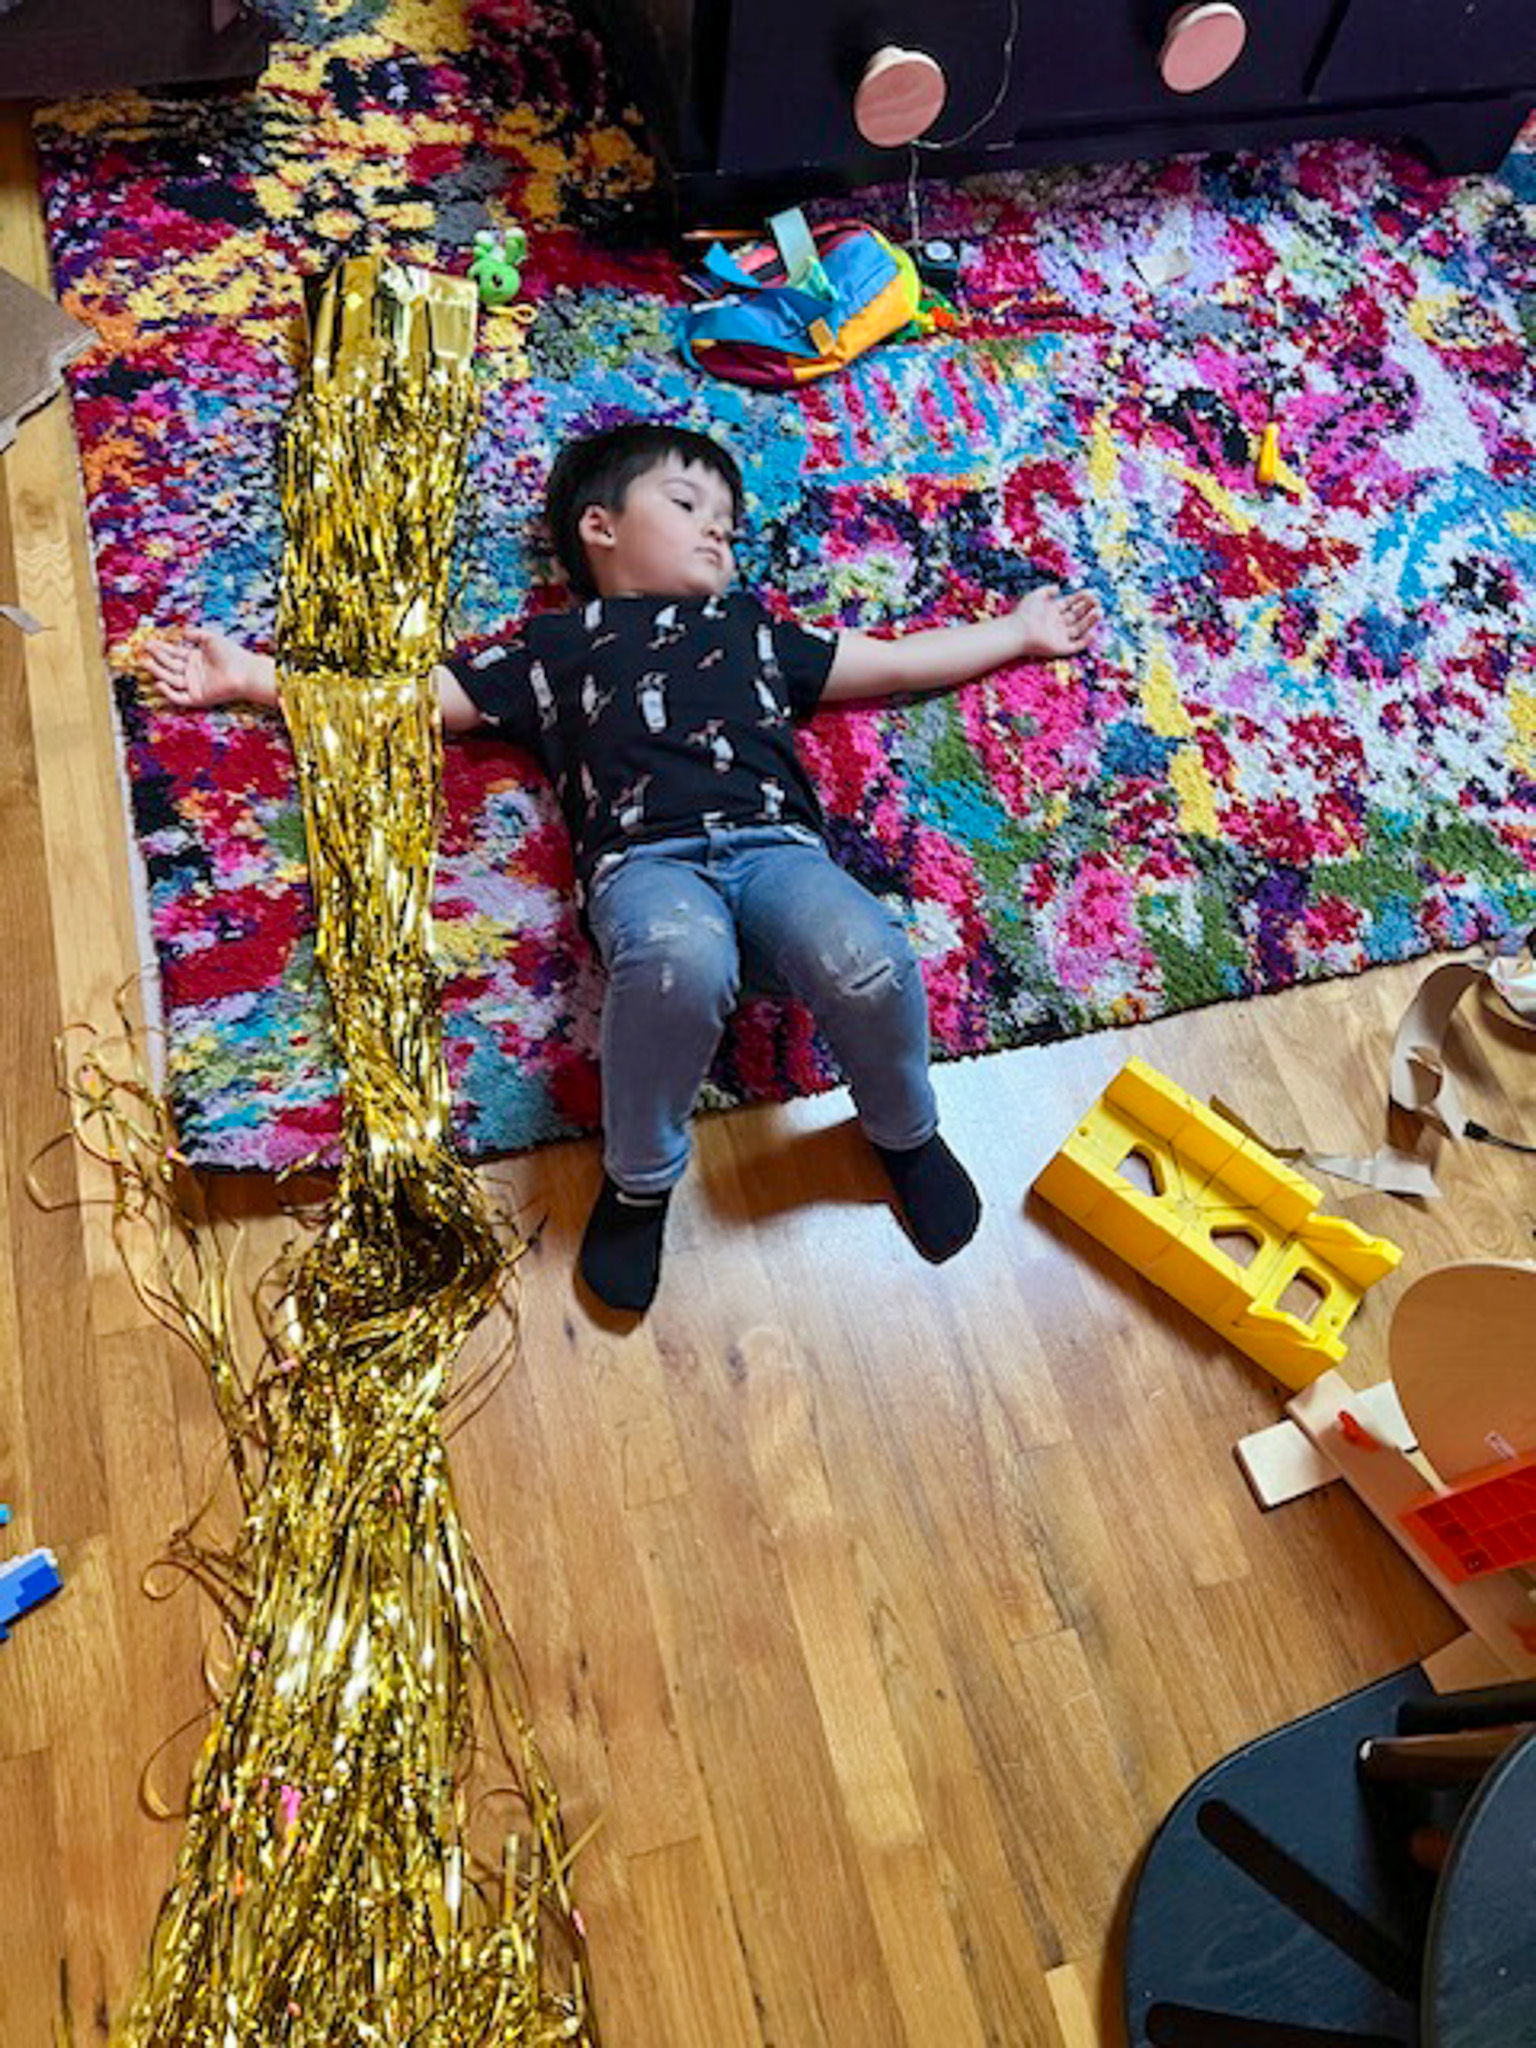
18. Glue the tinsel on with plenty of hot glue.
19. YOU’RE DONE. You’ve learned your lesson, your kid won’t see Pinterest again until he’s 13.
Alien Abduction Family Costume: Farmer
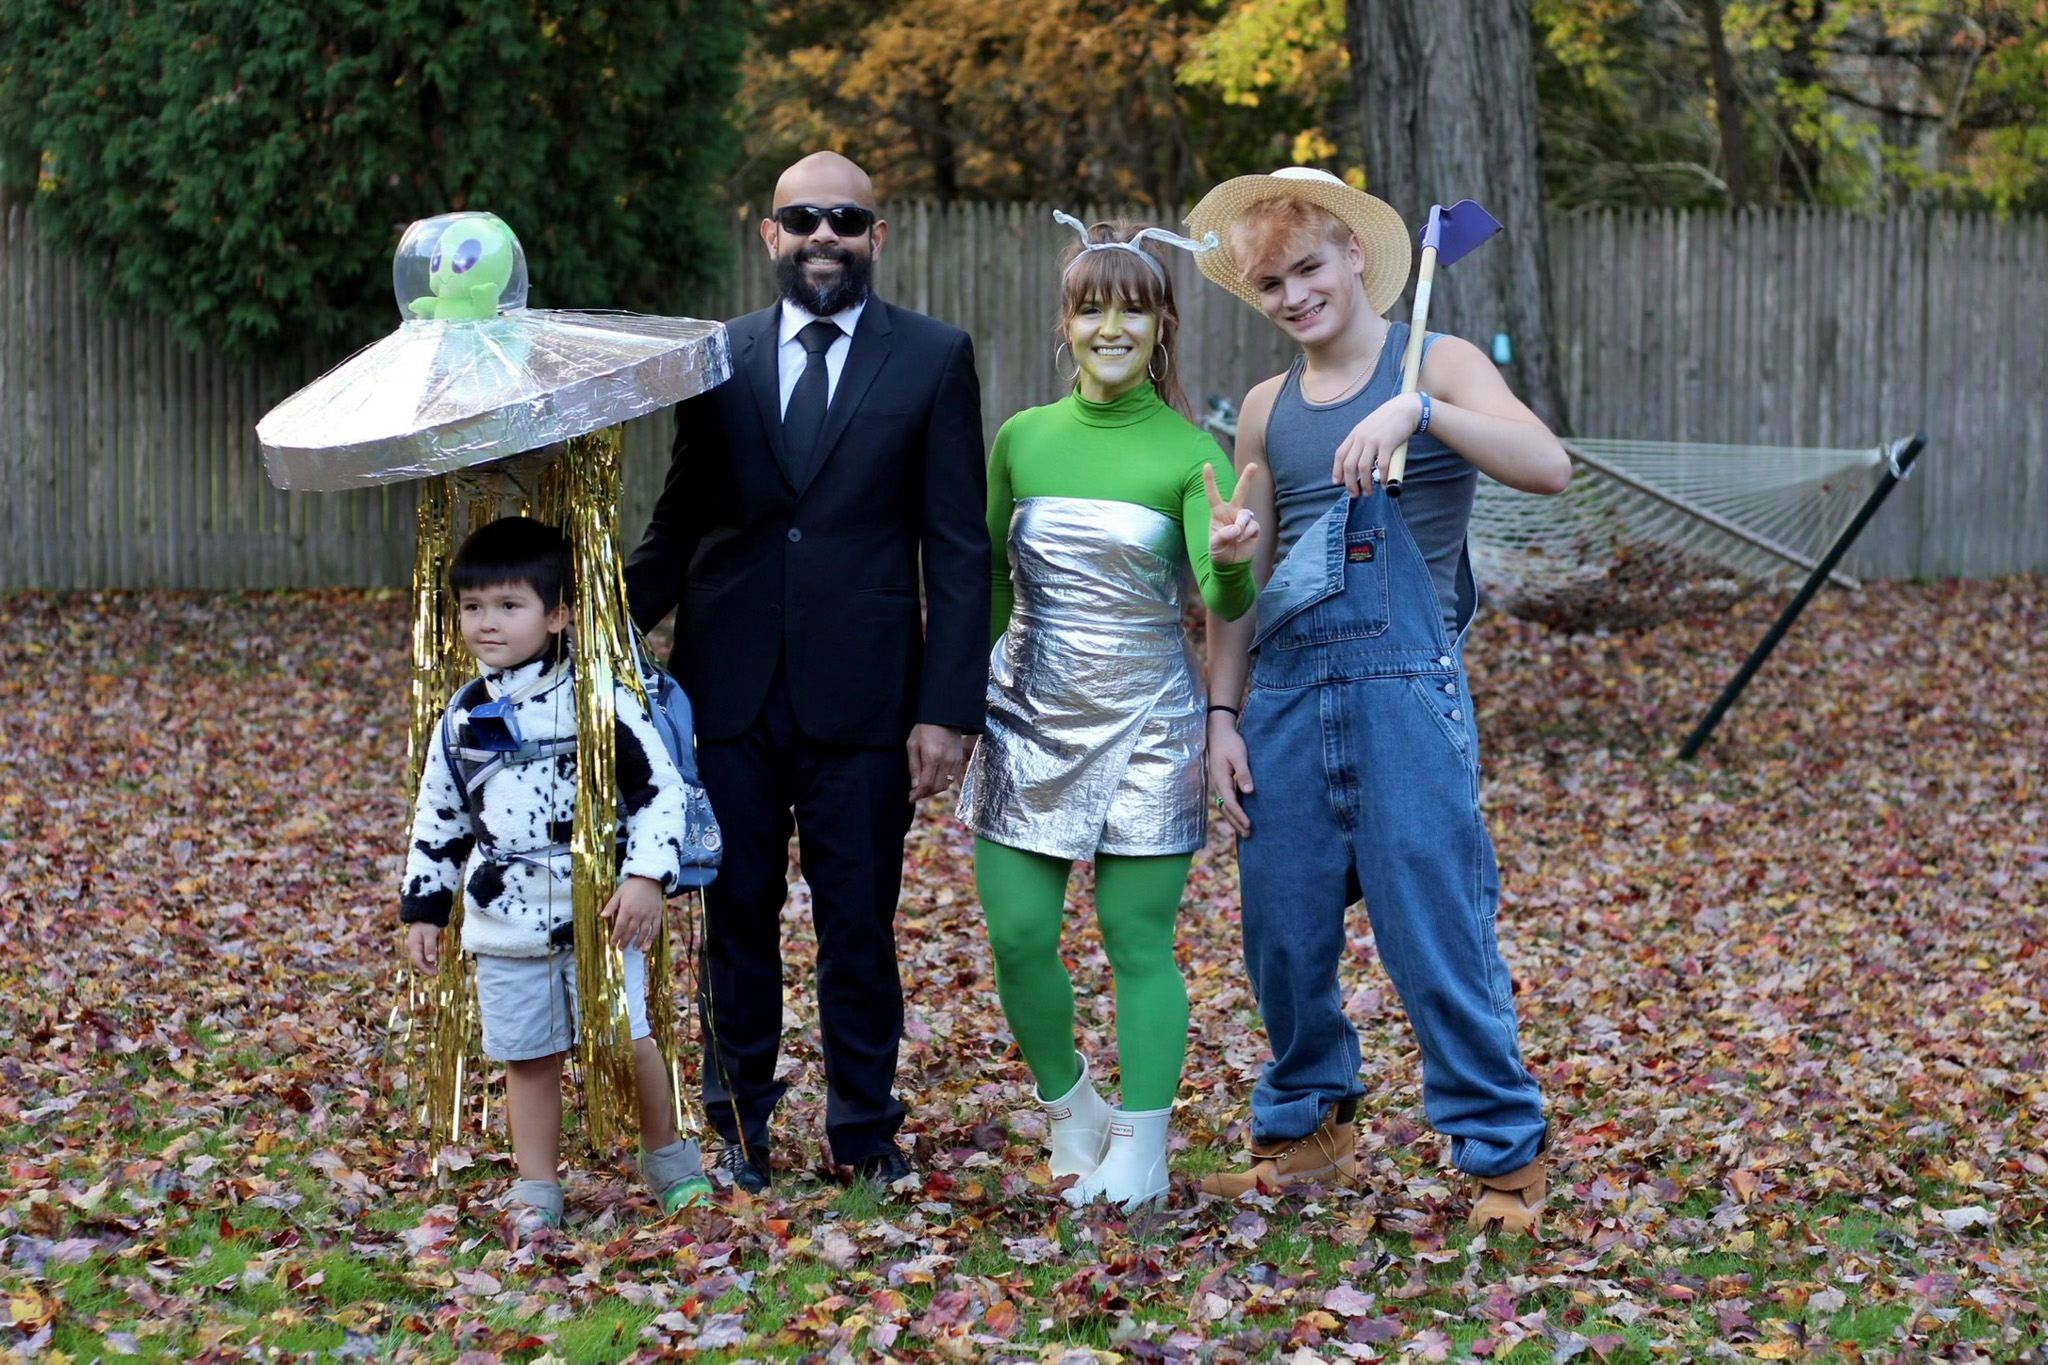
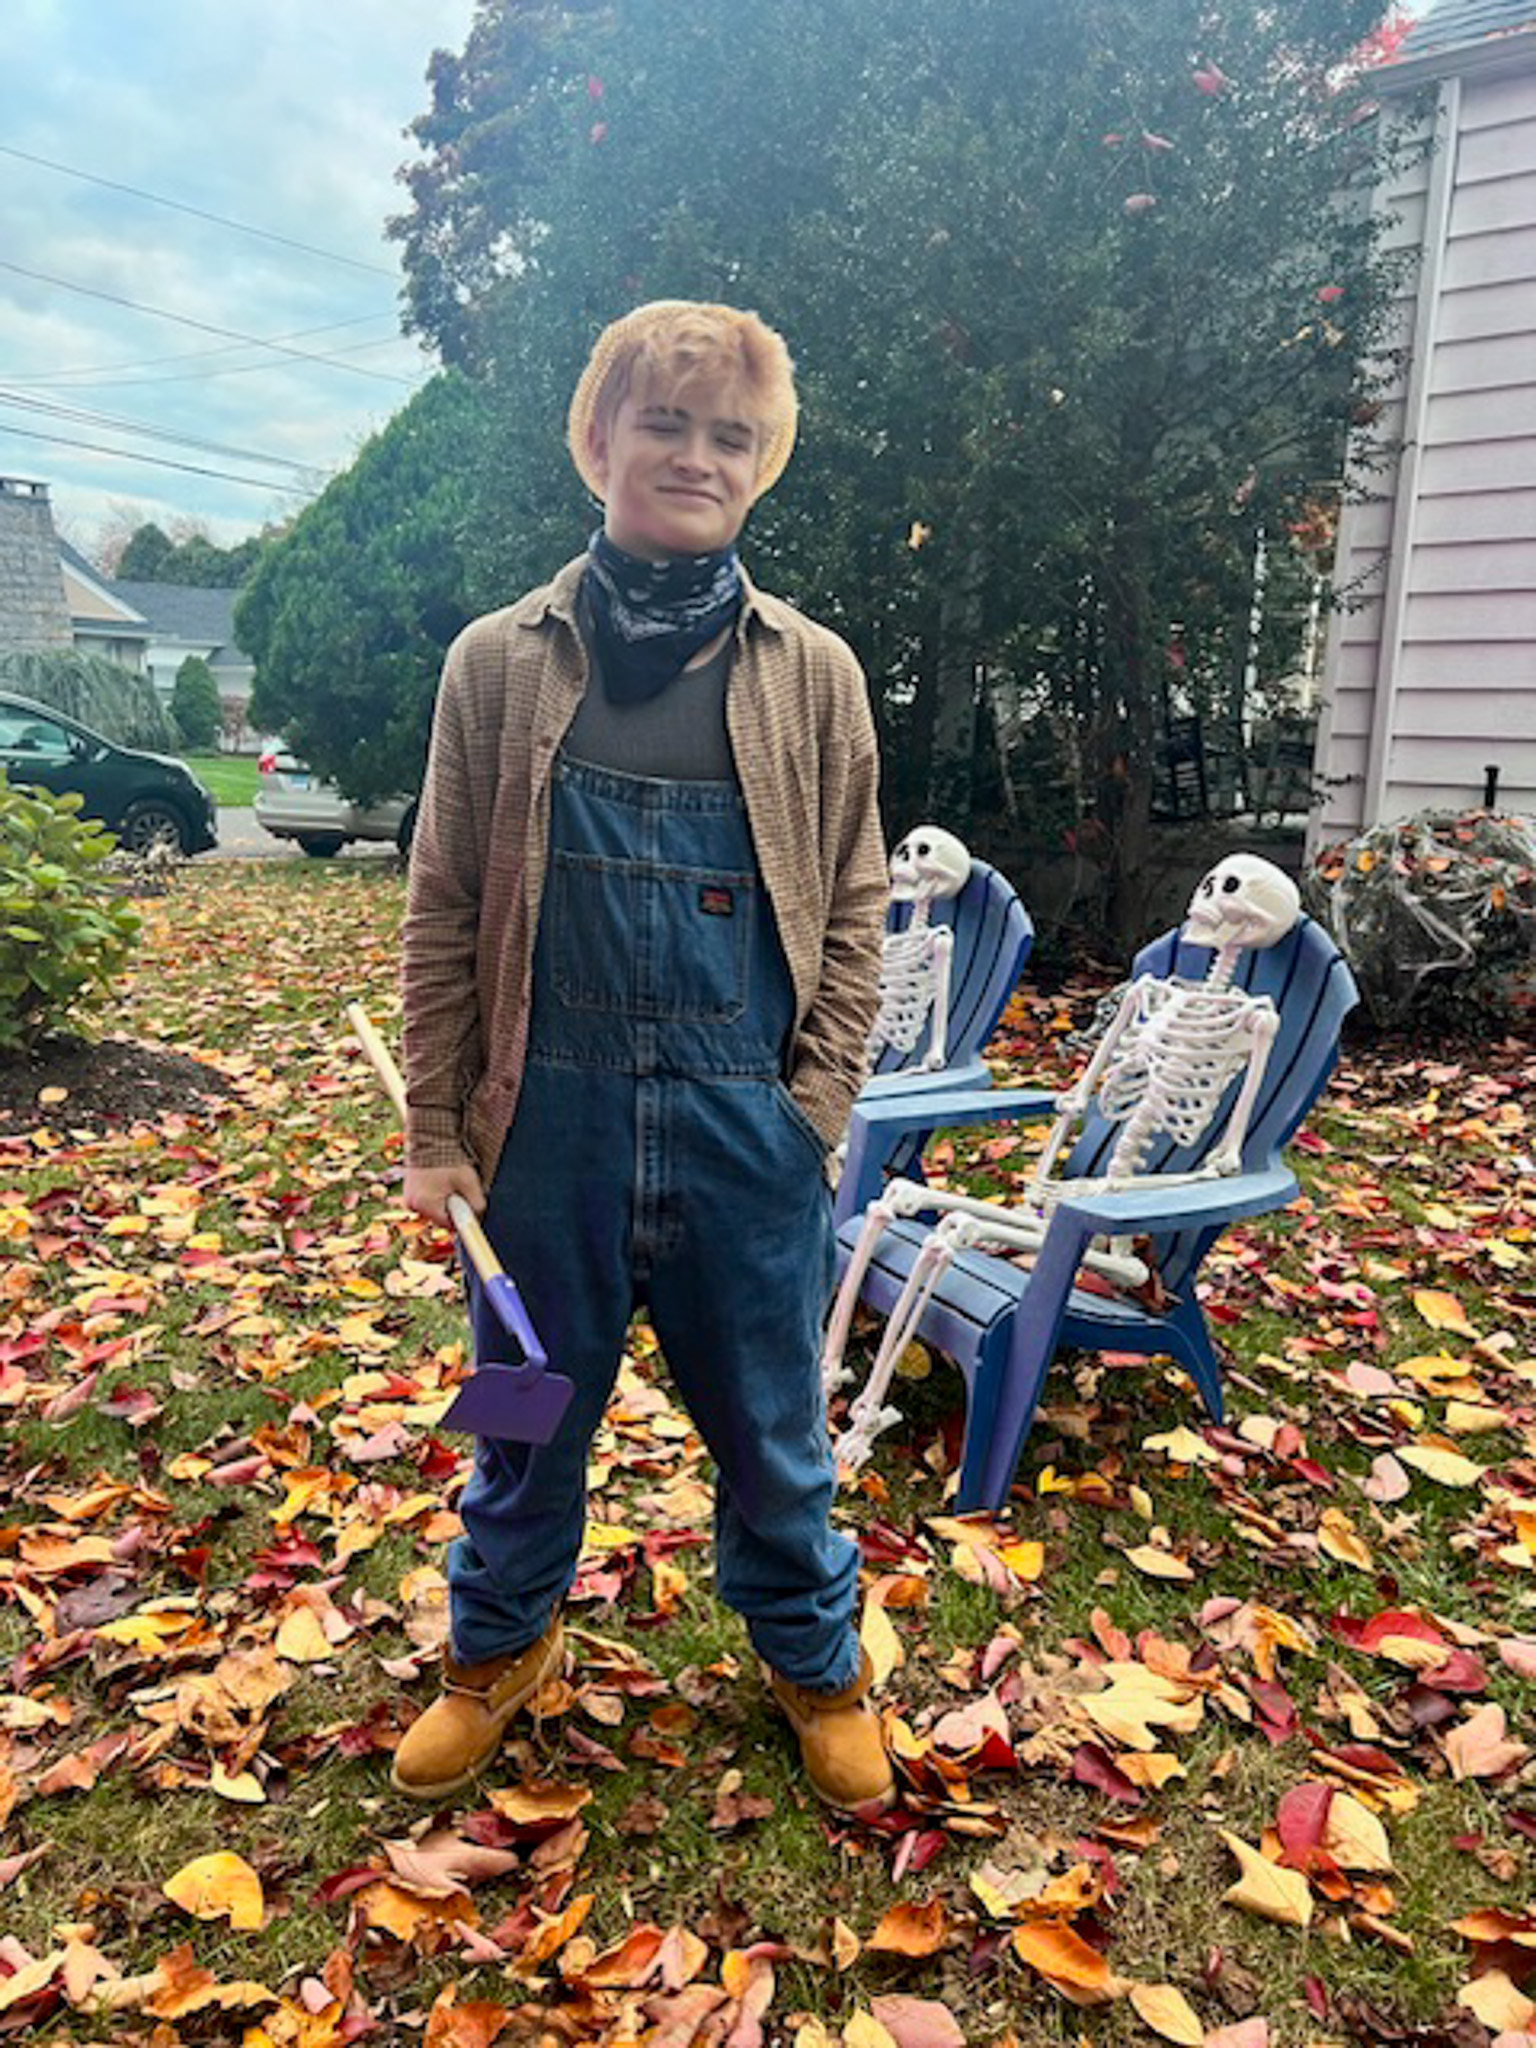
I thought my husband and older son would both be Men in Black, but last minute my teen decided he wanted to be a farmer, so he could wear his overalls. I love that he had this idea, because I feel like this group costume tells a whole story in one photo.

Alien Abduction Family Costume: Alien Woman
Look, I really would have preferred to be some super-hot midcentury version of alien, like these two chicks.

I didn’t have that kind of time or patience or a wig or cute gogo boots etc, etc. I found this chipotle-burrito-ass dress for cheap on ASOS tho:
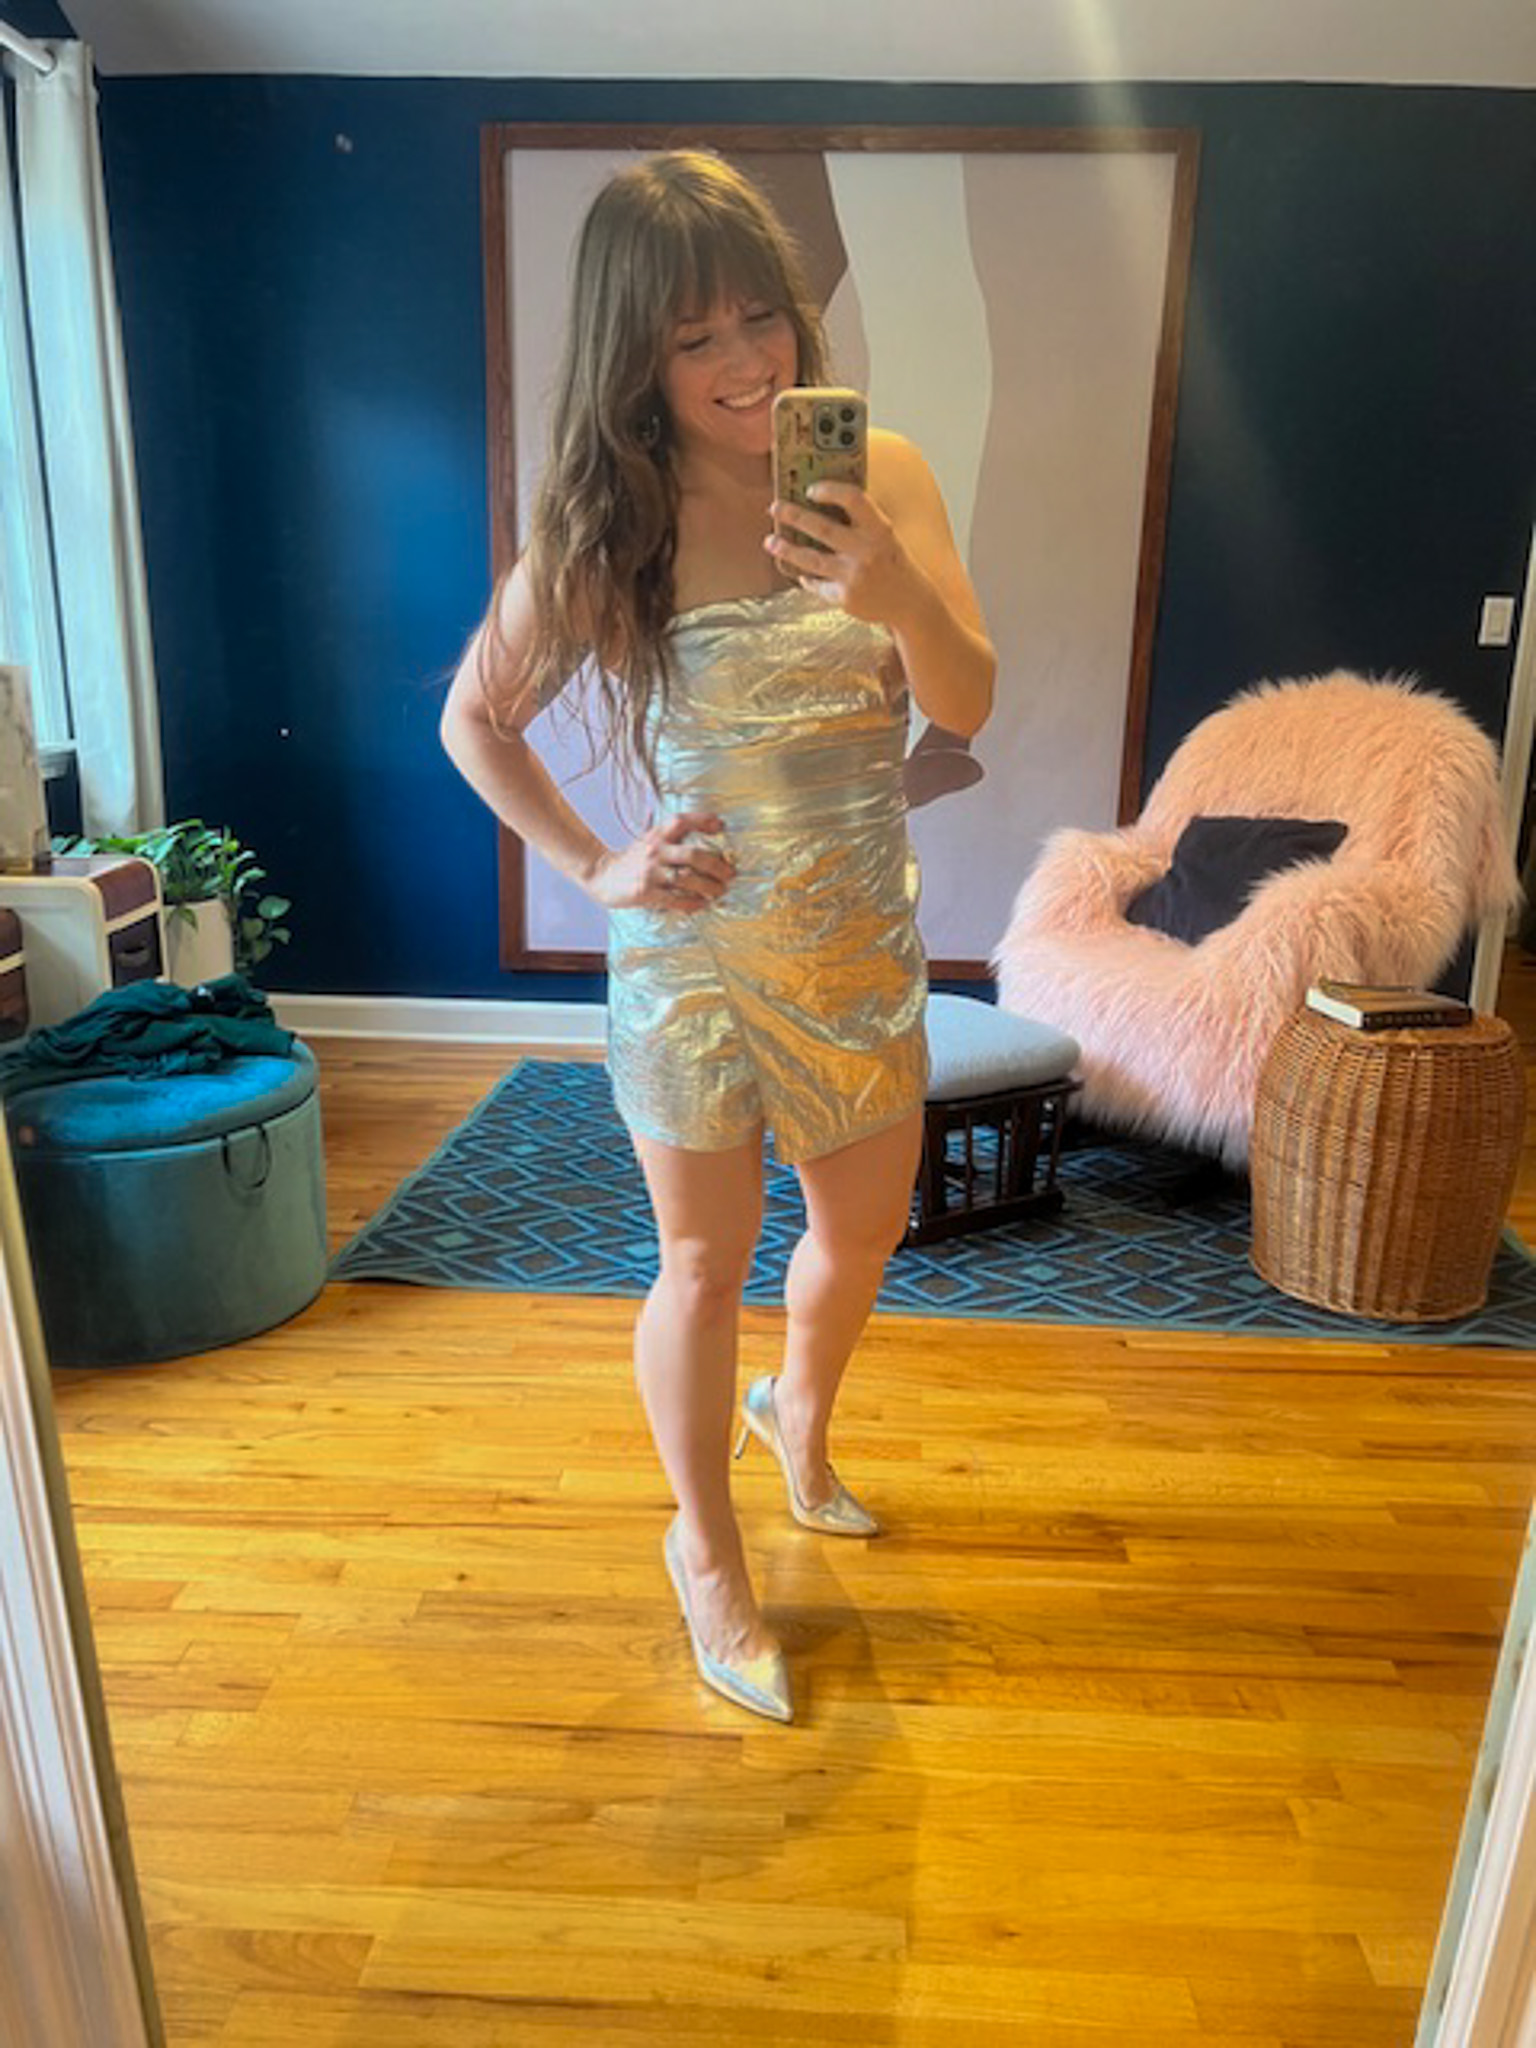
Got matching bright green tights and bodysuit and a few shades of green eyeshadow to use as highlighter and contour.
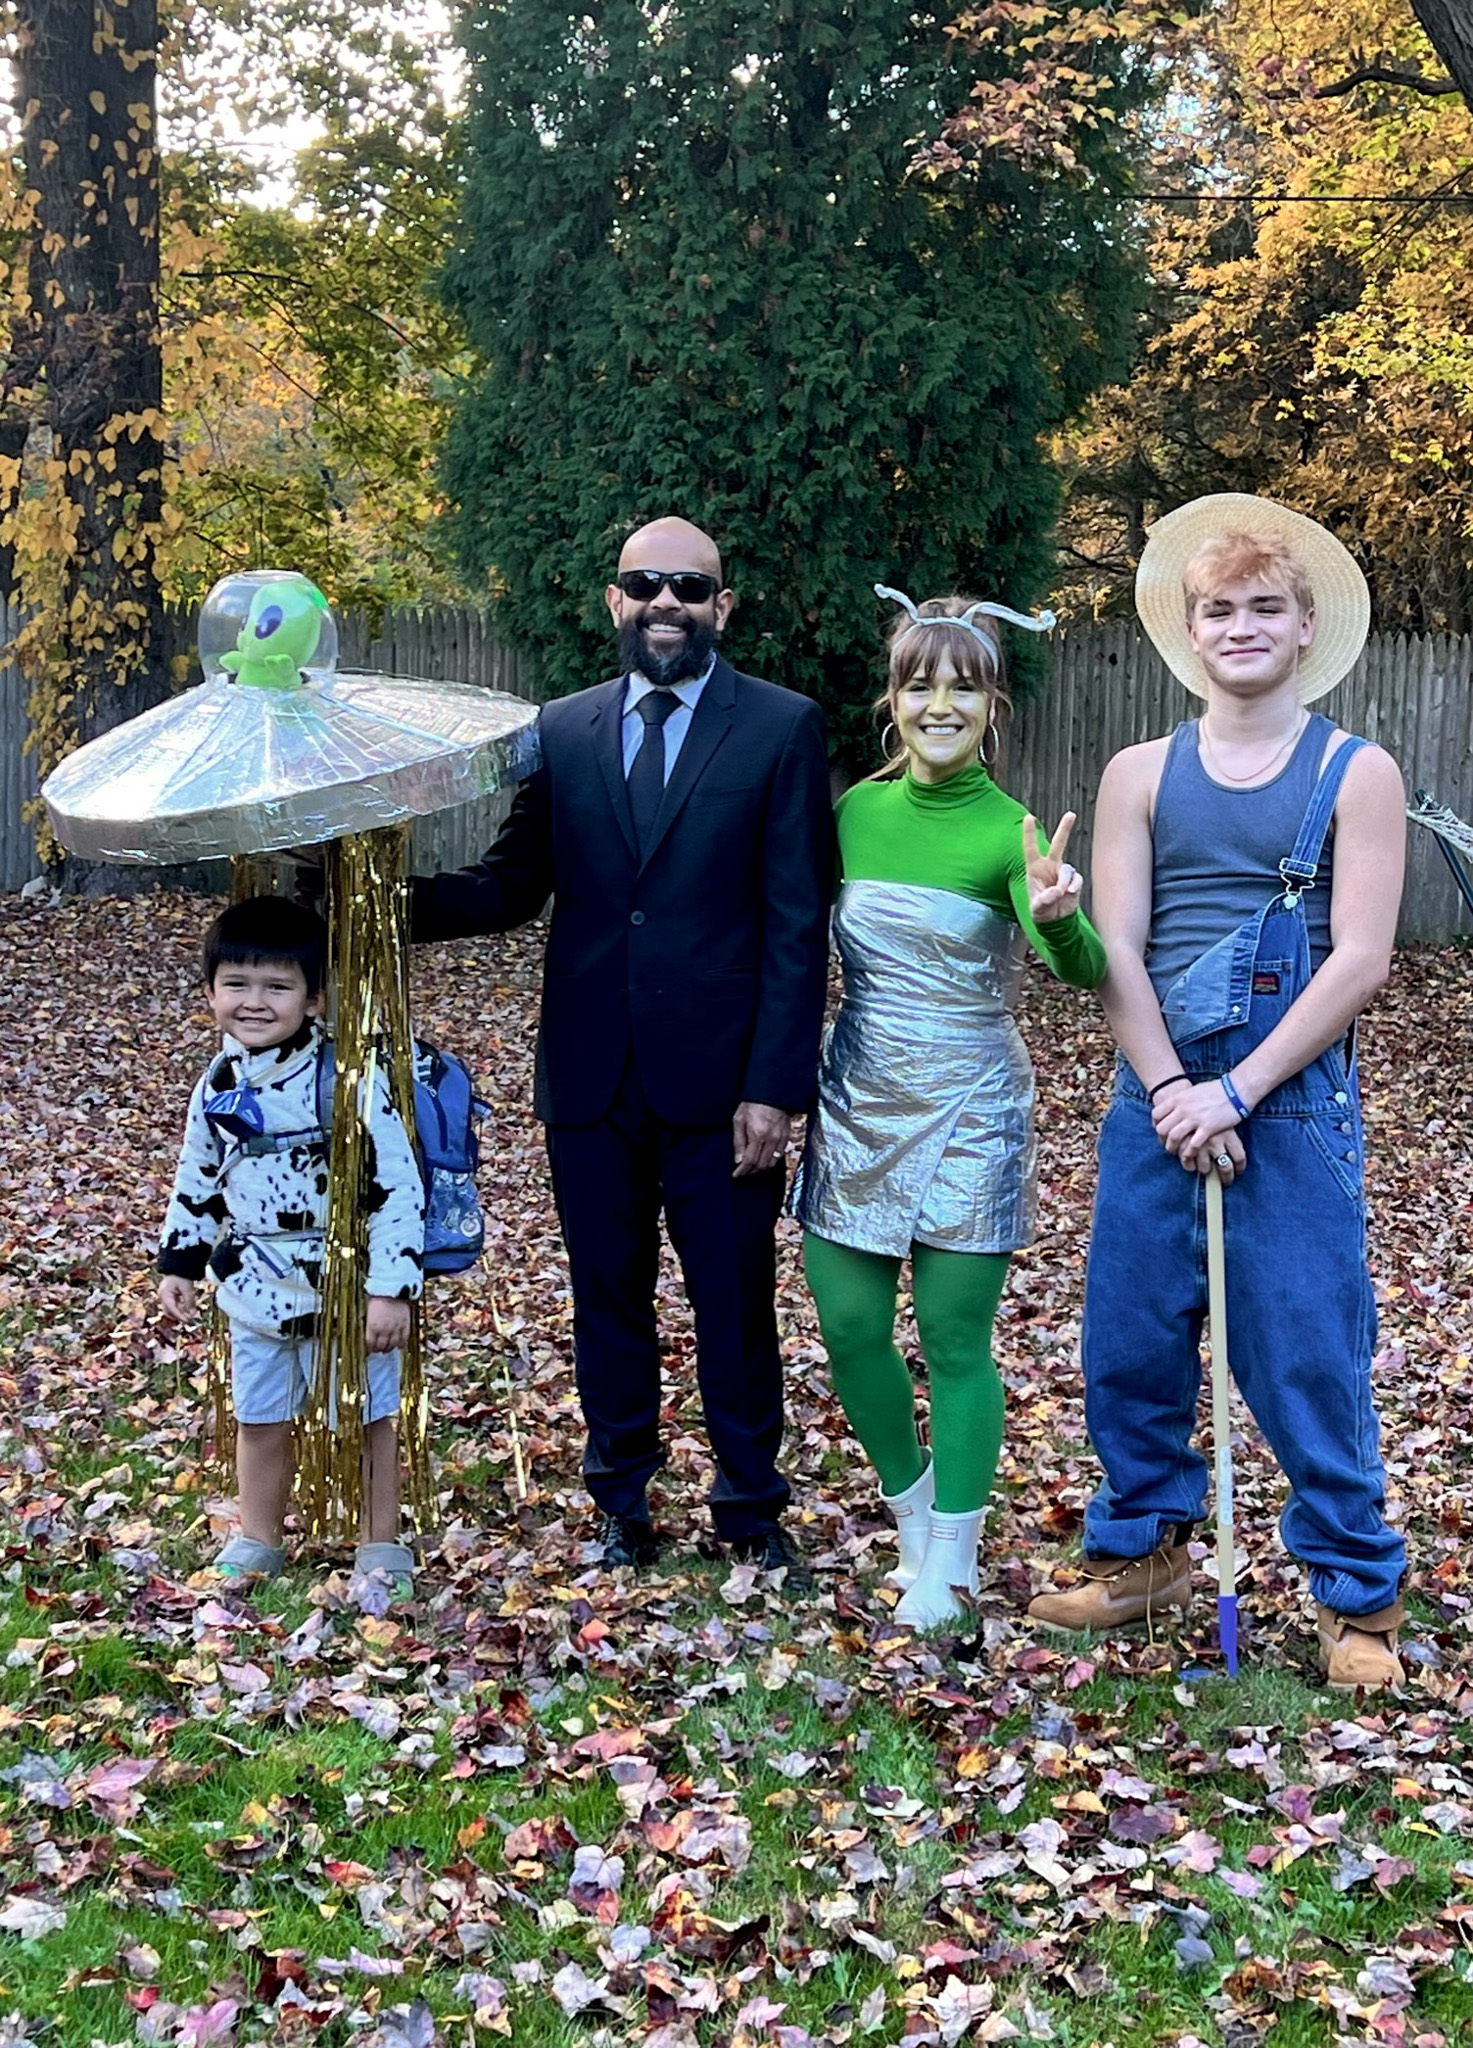
Man in Black is Self Explanatory.
A trip to Petco to dog food led me to stumble upon an impulse purchase to get the dog in on it, too:
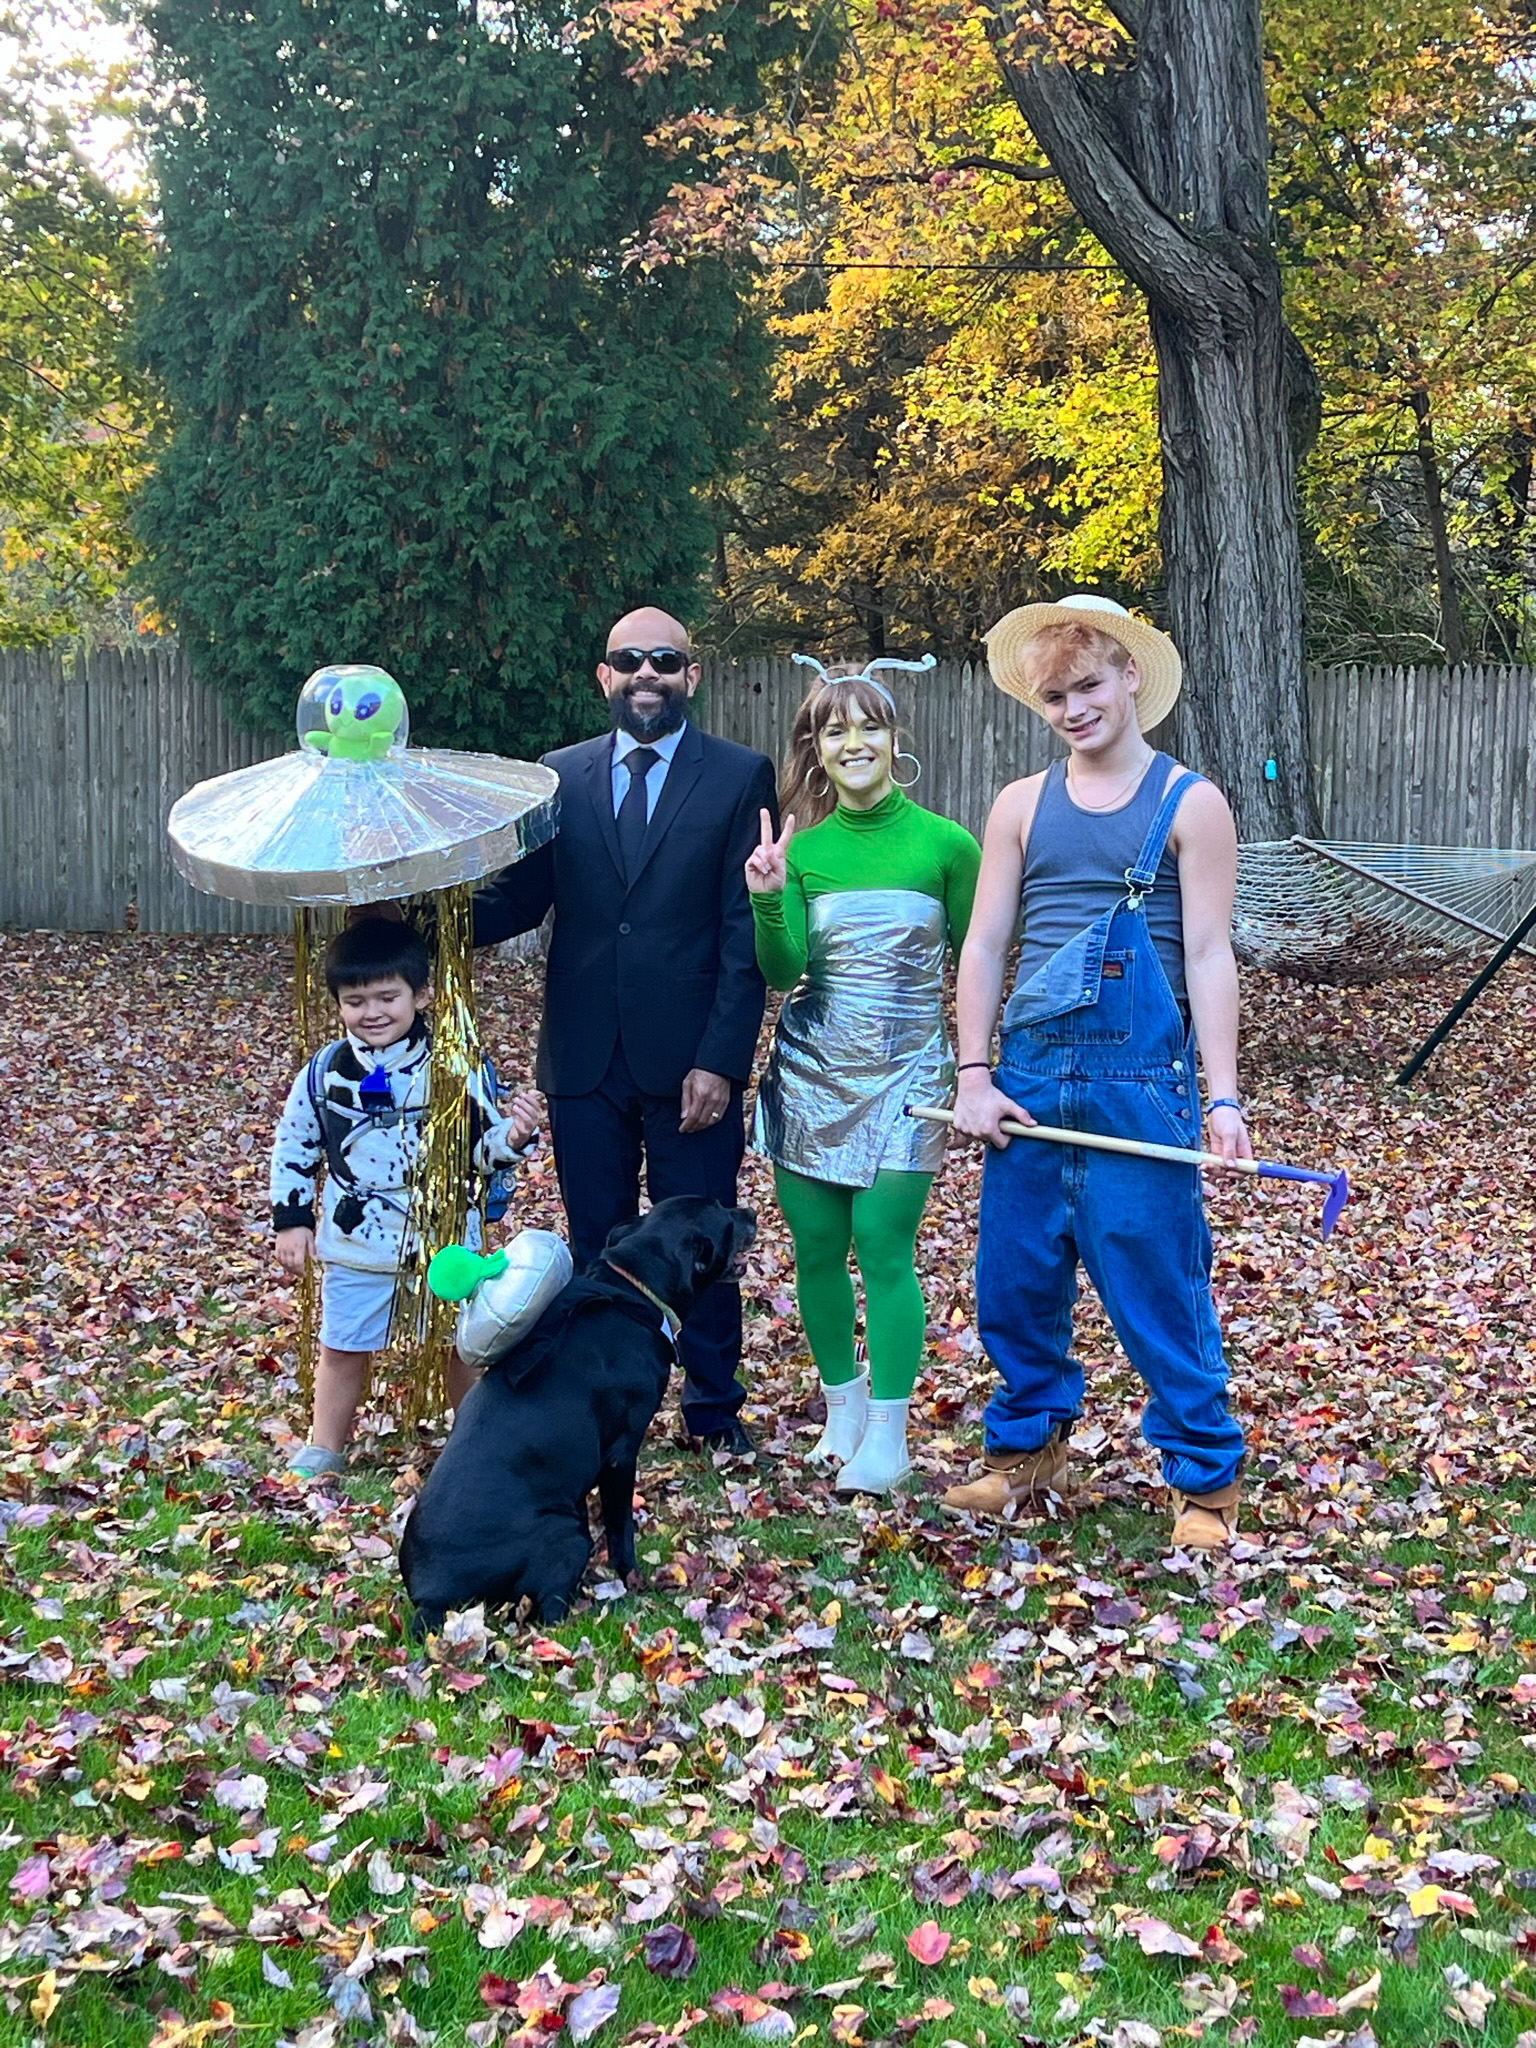
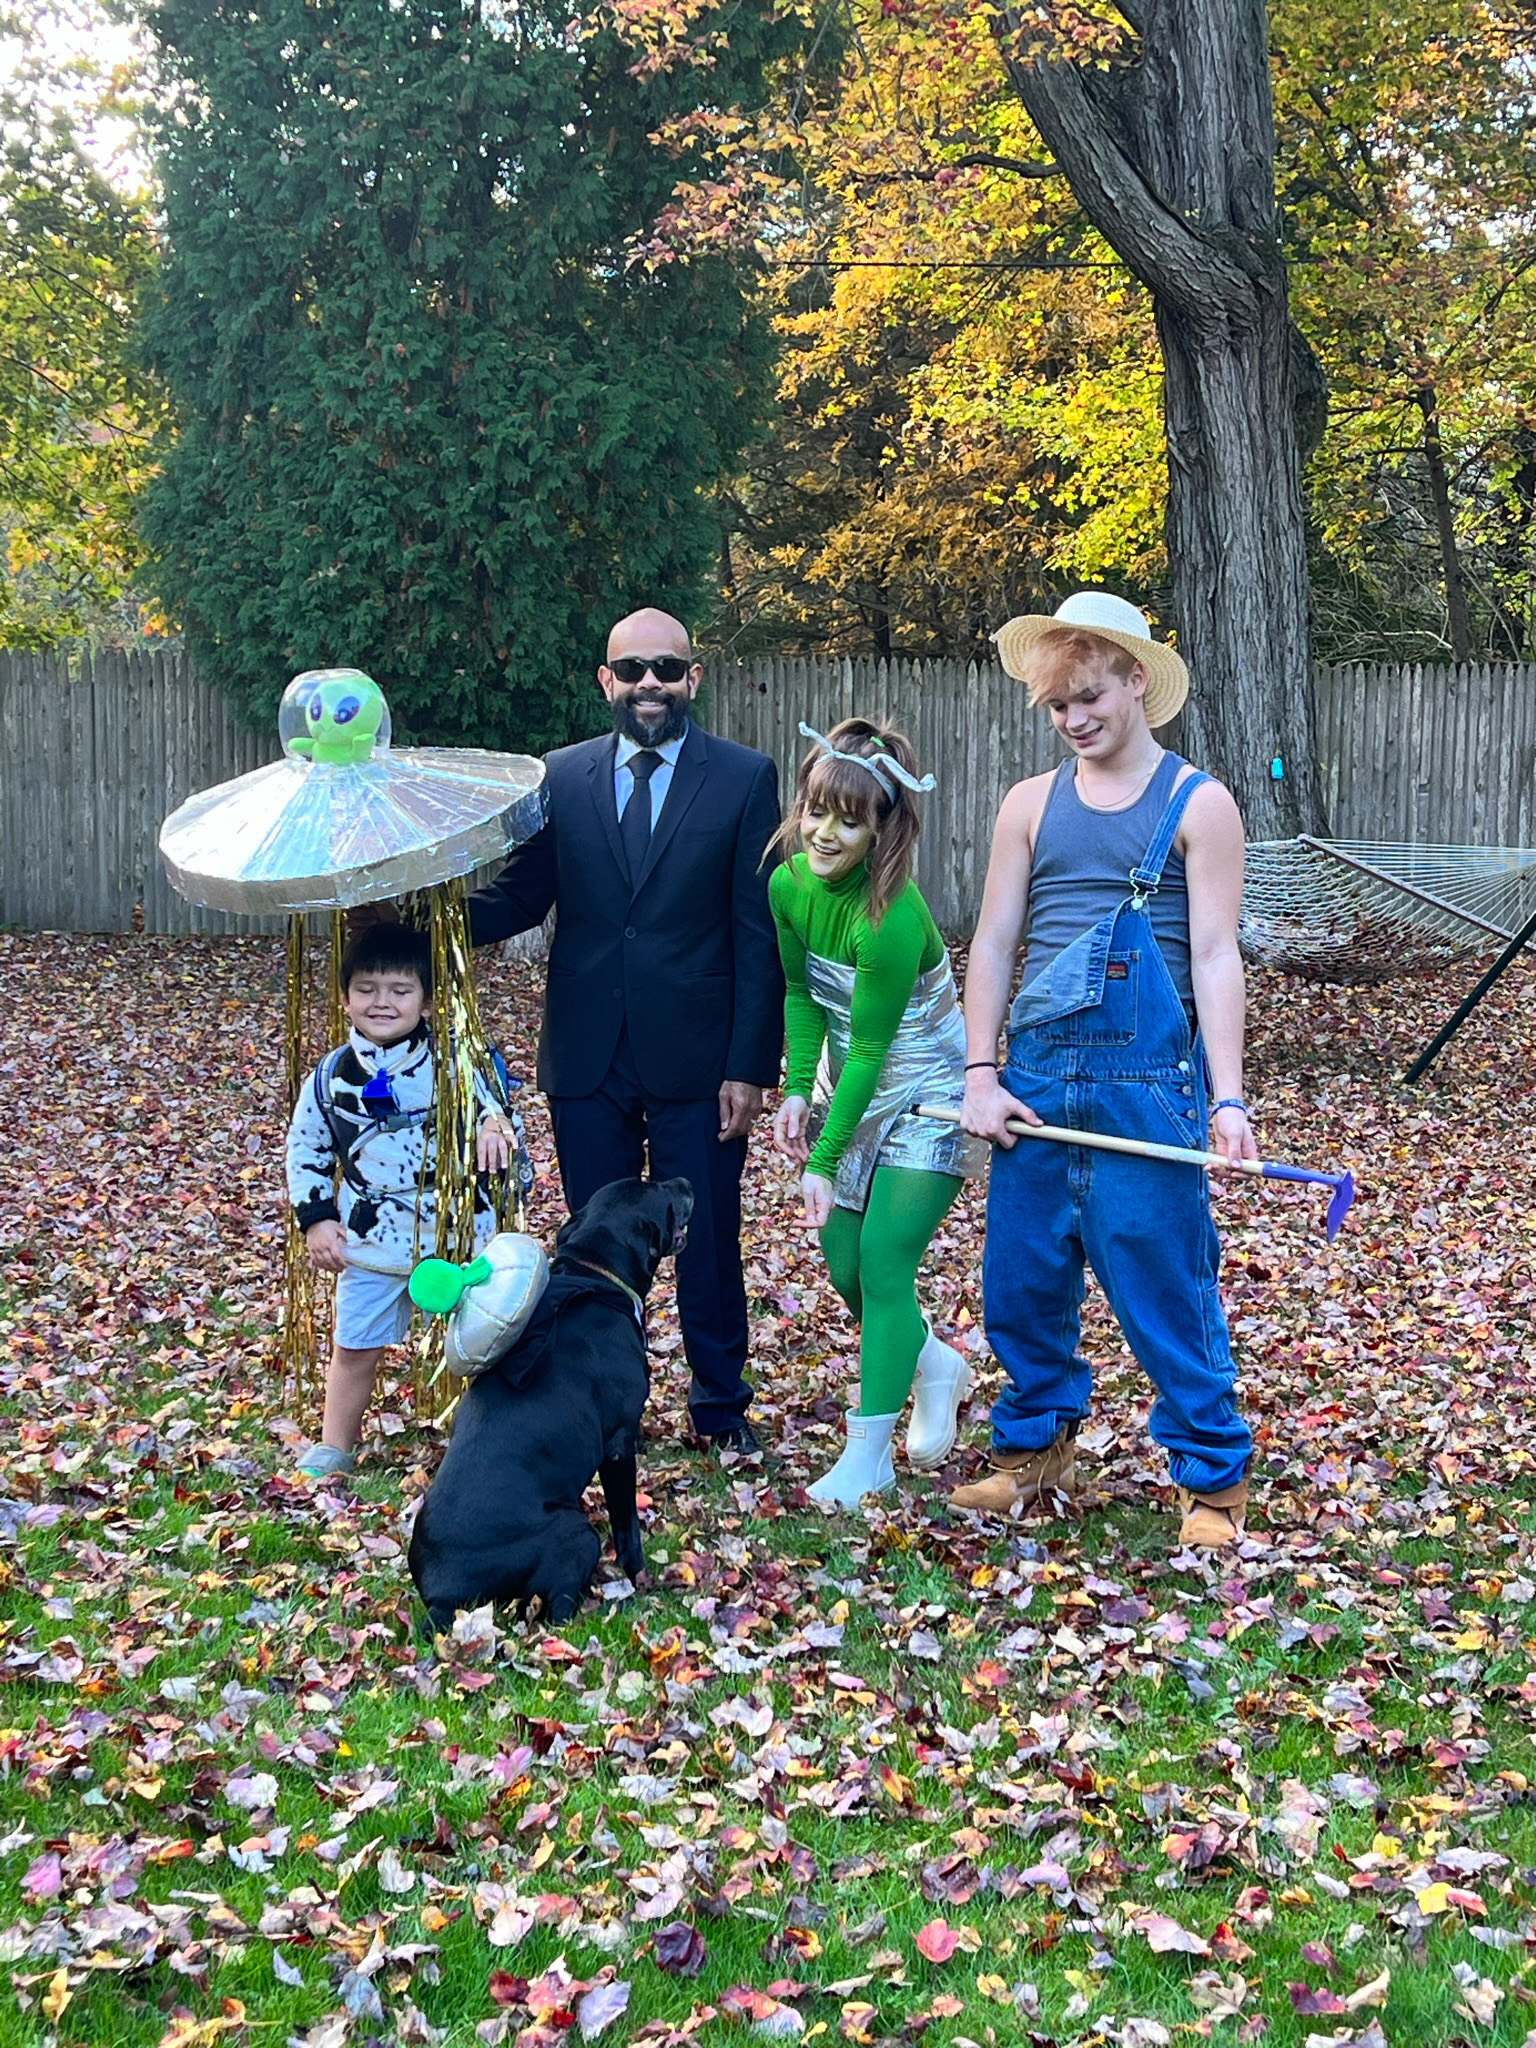
But he clearly had no idea what he was doing.

Abducted Alien in Action


…and out.
It was too heavy and cumbersome for a five year old, so I wouldn’t recommend this costume to a child of that age. It requires core strength, light lifting and endurance. I was concerned about this potentially being a problem, and that’s why we had him dress as an abducted cow rather than a child. I already had the cowbell from my old marathon racing days. Added bonus was that I couldn’t lose him in the dark!
Also, my husband and I didn’t have on the full family garb for trick or treating, that was reserved for a Halloween party the weekend prior. So we took turns rockin’ the look and accepting the compliments when the little dude got too tired to carry it while running house to house.

What do you think?