Large Scale Circular Woven Art DIY
It all started with a hula hoop.
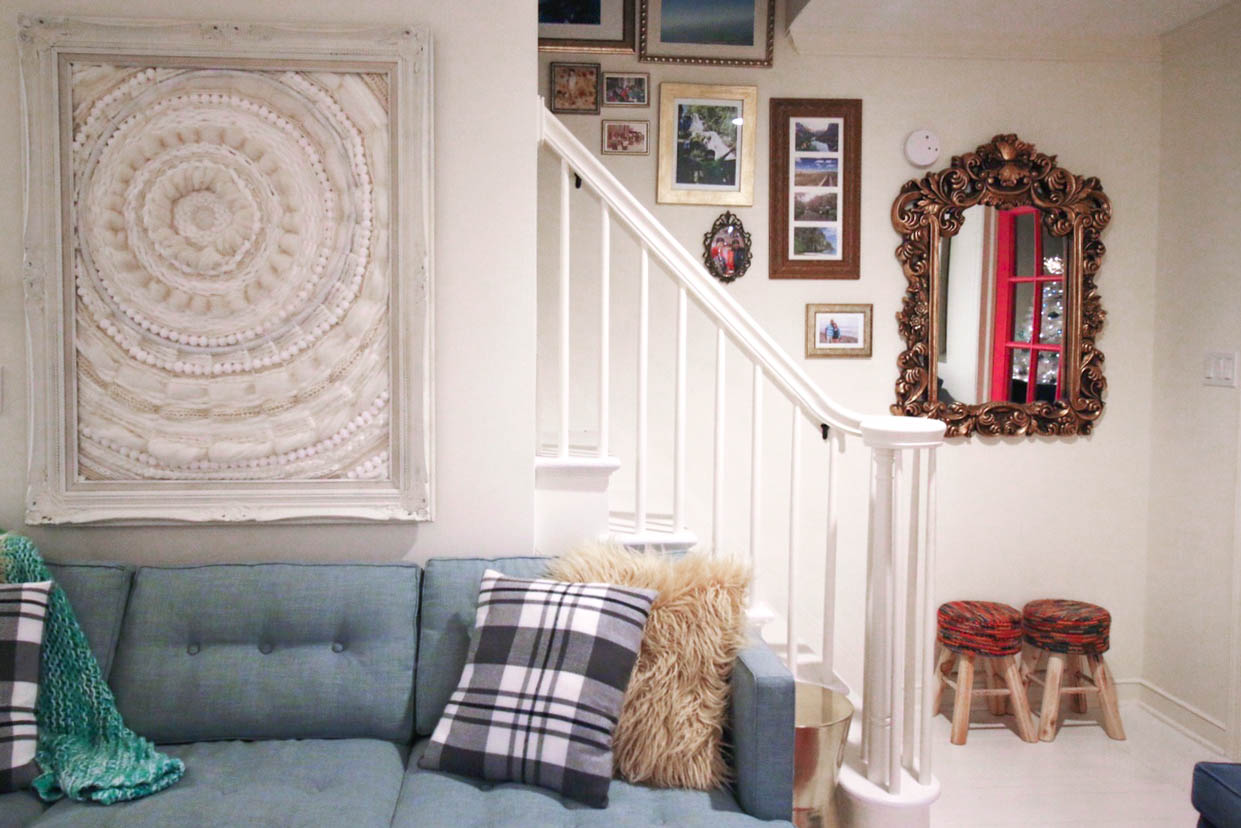
Remember the blog post about making woven art with a hula hoop? I had that piece hanging above my couch for all of these months, but there was one thing that was bugging me nonstop: the scale.
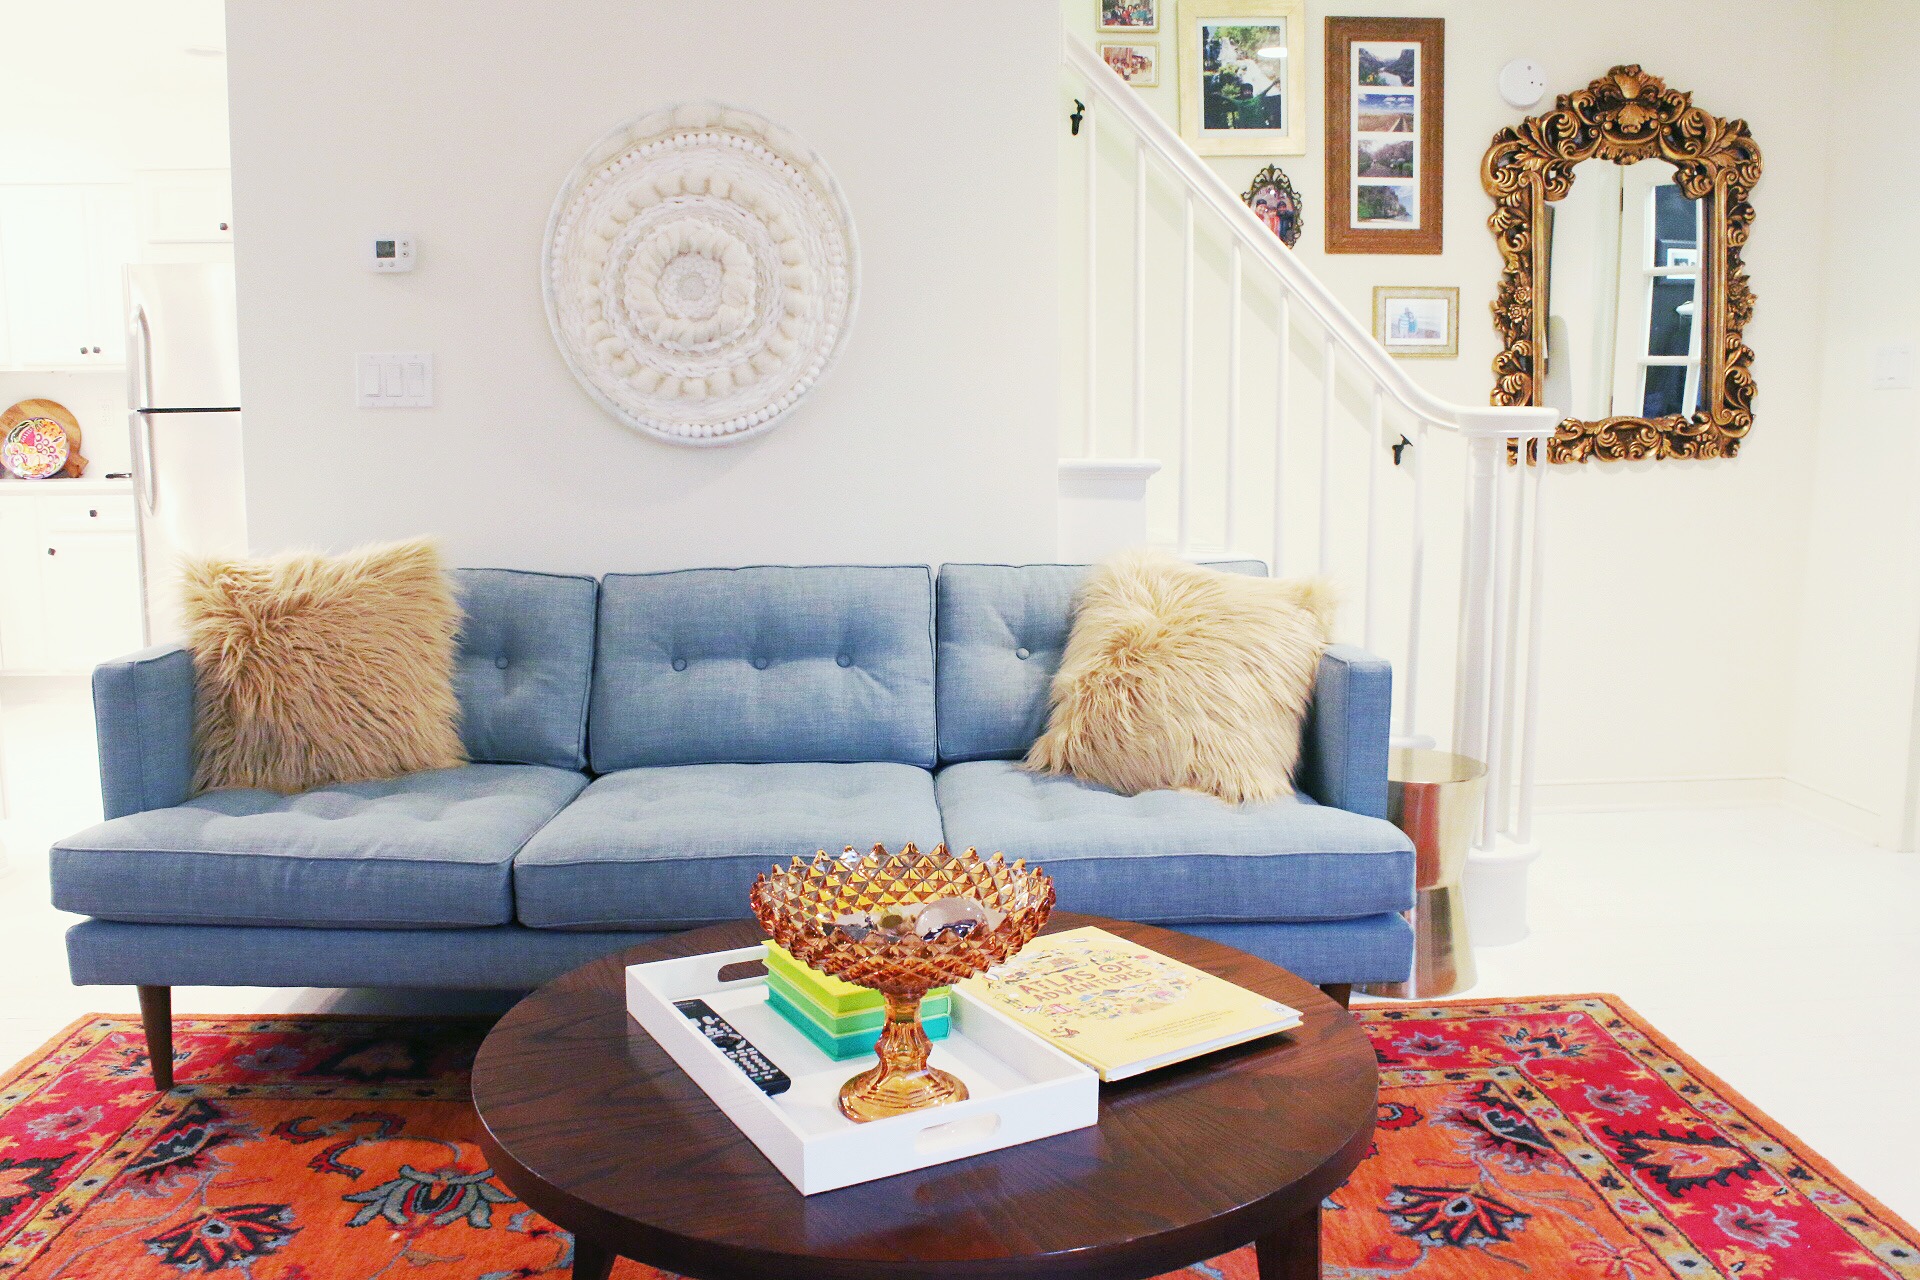
It wasn’t big enough for the space. I’ve been studying styling small spaces for quite some time, and during that time, I’ve learned that larger scale items in a room, assuming they aren’t crowding it, make it seem less cluttered and larger. So that child-sized hula hoop wasn’t going to cut it.
I eventually found an adult sized hoop, and even wrapped the outside in yarn before second guessing going forward. The nearly-begun project sat in my basement for a month or so, before I saw this guy:
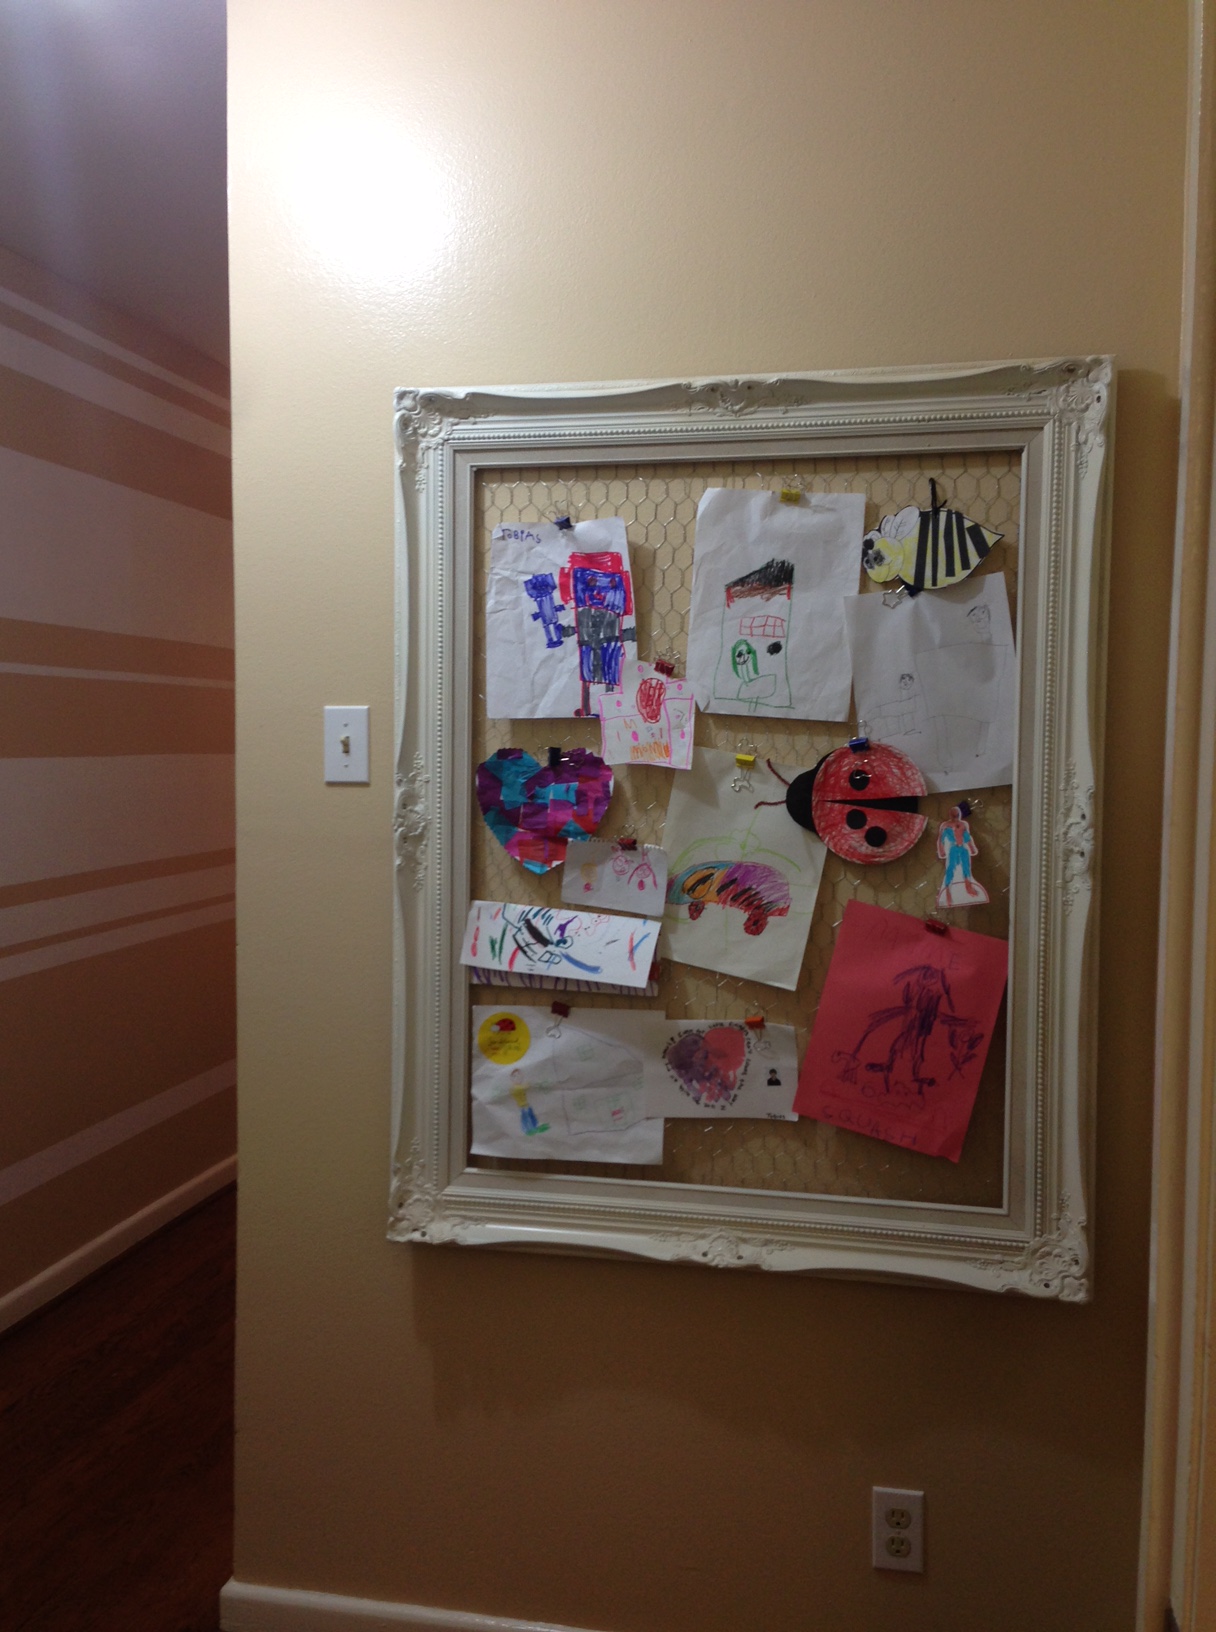
Well, not with the artwork on it. This frame, originally gold, was found at a thrift store. On their once-a-season half price day, I snatched it up along with the most hideous beginner oil painting of a swan one has ever seen in it. Seriously–it was dreadful. Surely it lowered the cost of the high quality frame it was in, so THANKS :).
After painting it and stapling chicken wire to the back, I used it to display Tobias’ ever-revolving artwork at our first house. Lacking a hallway, and frankly, any unclaimed wall, it was in T’s room before I made that over, later finding its home in the basement, right next to the hula hoop.
So, one could almost say that this project found me.
And it was simple enough!
Tools:
- Scissors
- Staple gun loaded with staples
Materials:
- A DIY Hula Hoop Weave from my previous post
- The chunkiest yarn you can find, several texture types
- Basic yarn
- Wool roving
- Pom Pom Garland
- Poster Board
- Tape
- A large frame with hanging kit
Steps:
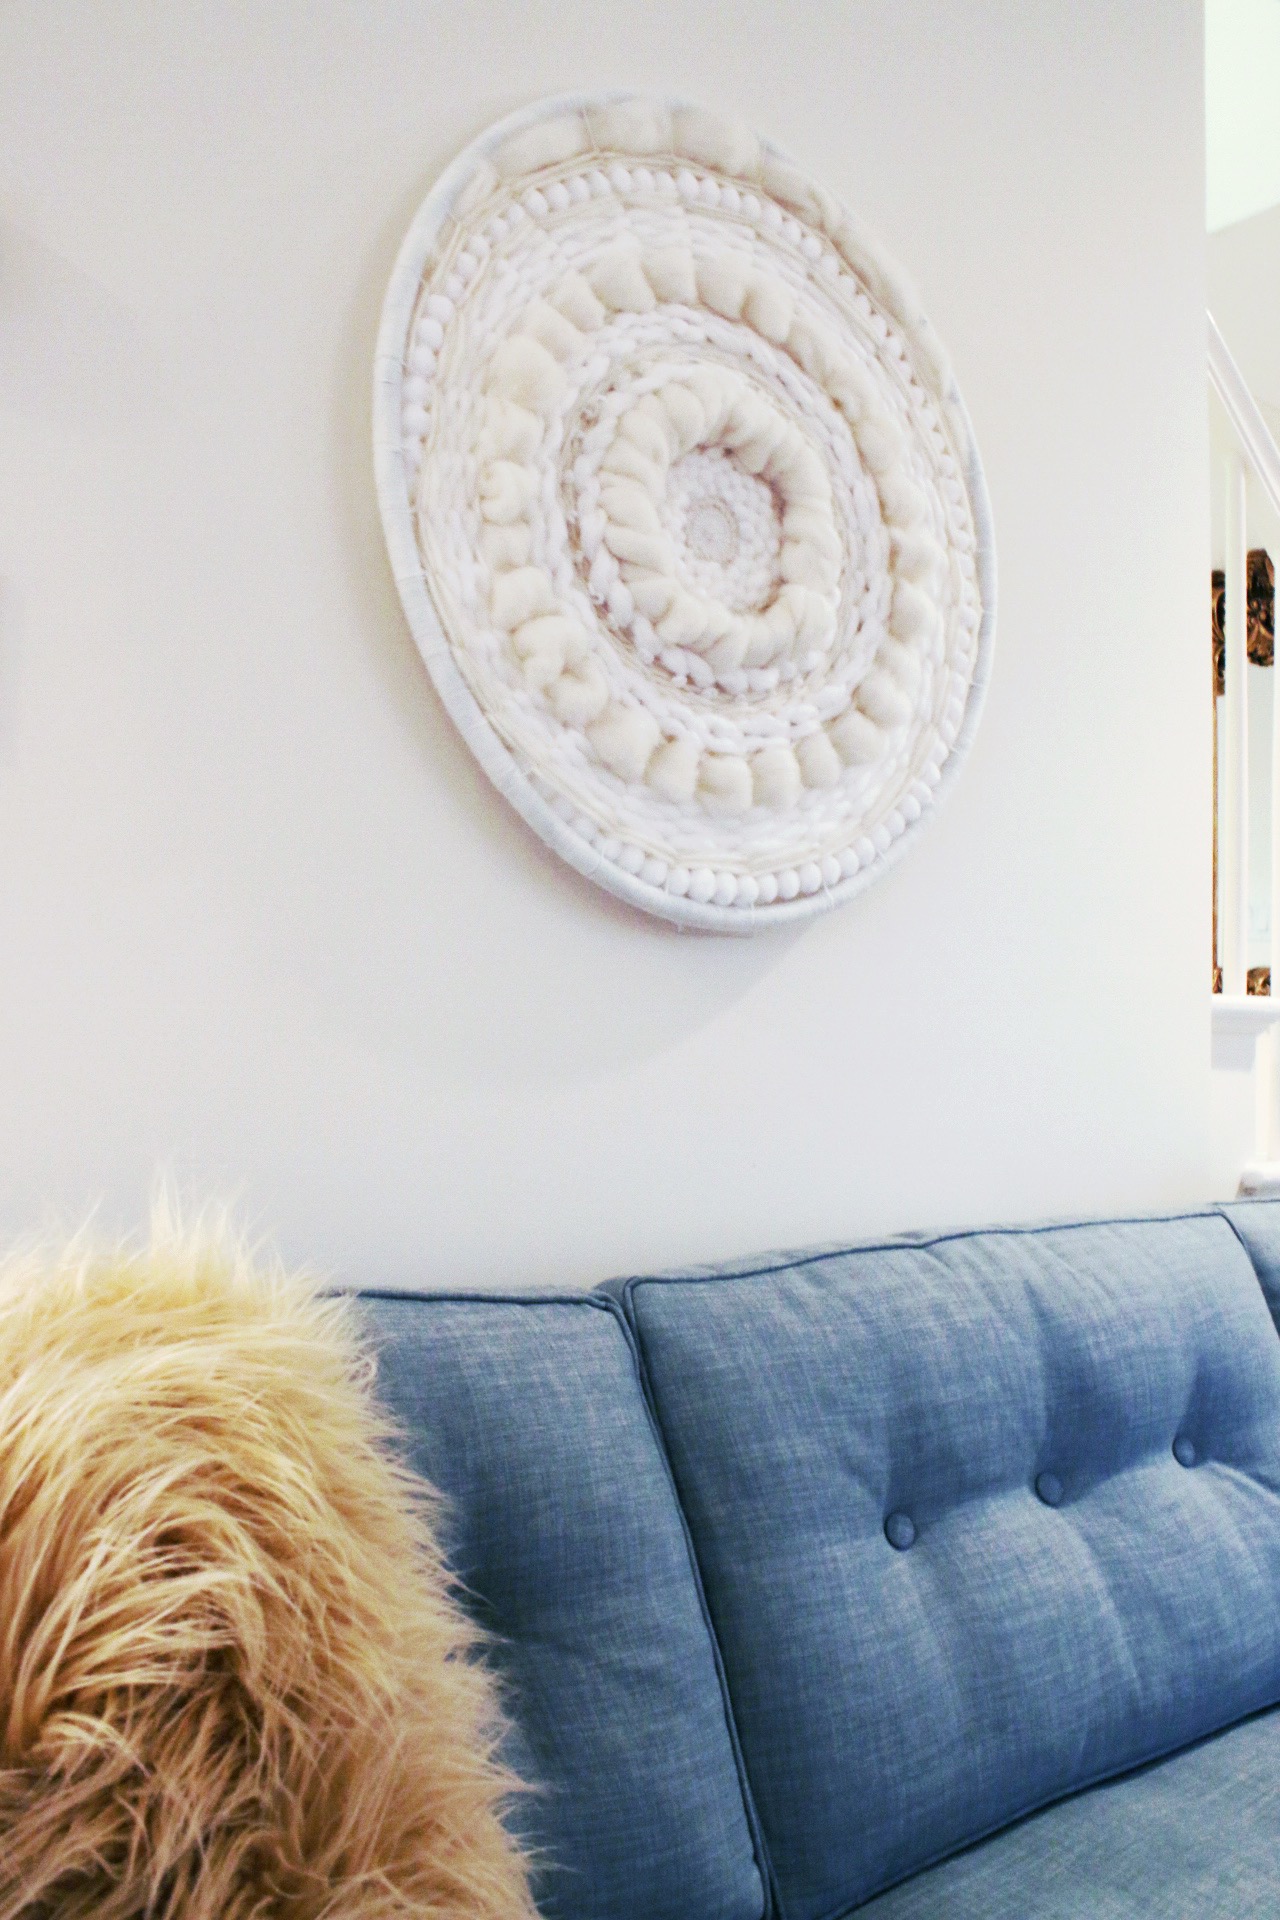
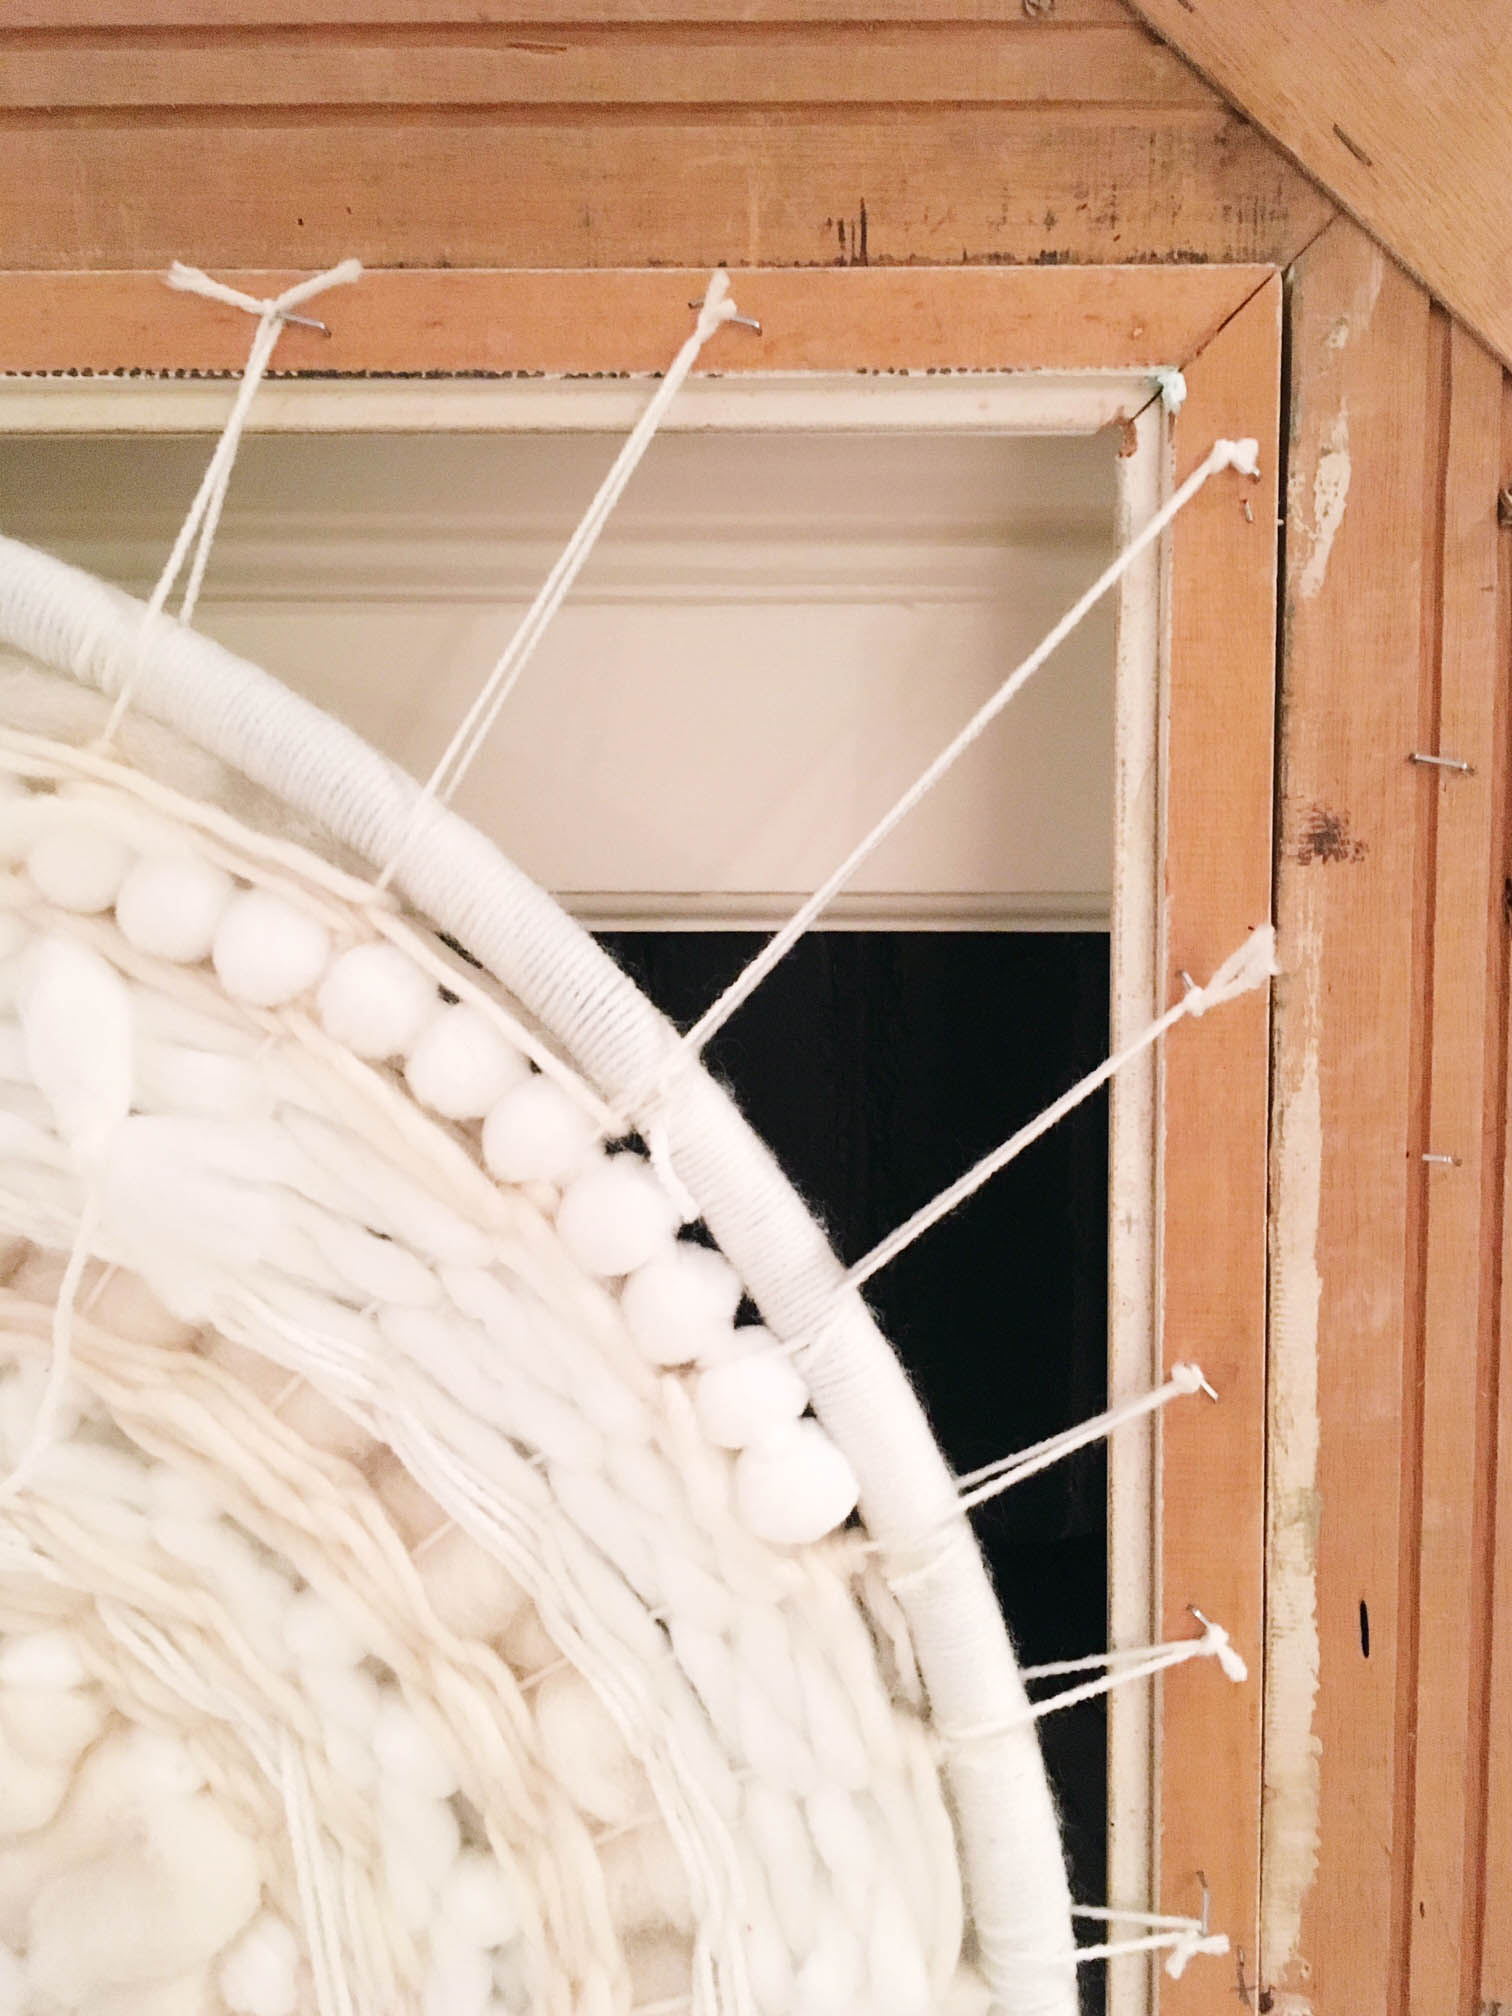
- Decide where in your frame you’d like the hoop weave. I wanted to draw the eye up, so the center of mine is as high as it would fit with the existing weave.
- With the frame facing away from you, pull one end of basic yarn through the hoop, closest to the outer edge of the hoop. I suggest doing so near where the original warp thread was for a cohesive look.
- Keep pulling until the end of the yarn and the yarn closest to the ball are long enough to reach from behind the frame, through the hoop at its desired positioning, back to the inside of the frame, with an additional 2-4 inches.
- Staple yarn on back of frame.
- Repeat steps 2-4 until you have as many warp threads as you did in your original weaving. It should look like this:
- Get to weaving! Because my warp threads were so far apart, I didn’t do as many fancy weaving techniques as the last portion of the weave. I did do some finger weaving and traditional braiding off of the loom with different yarns.
- With each line of weaving, staple to the back of the frame.
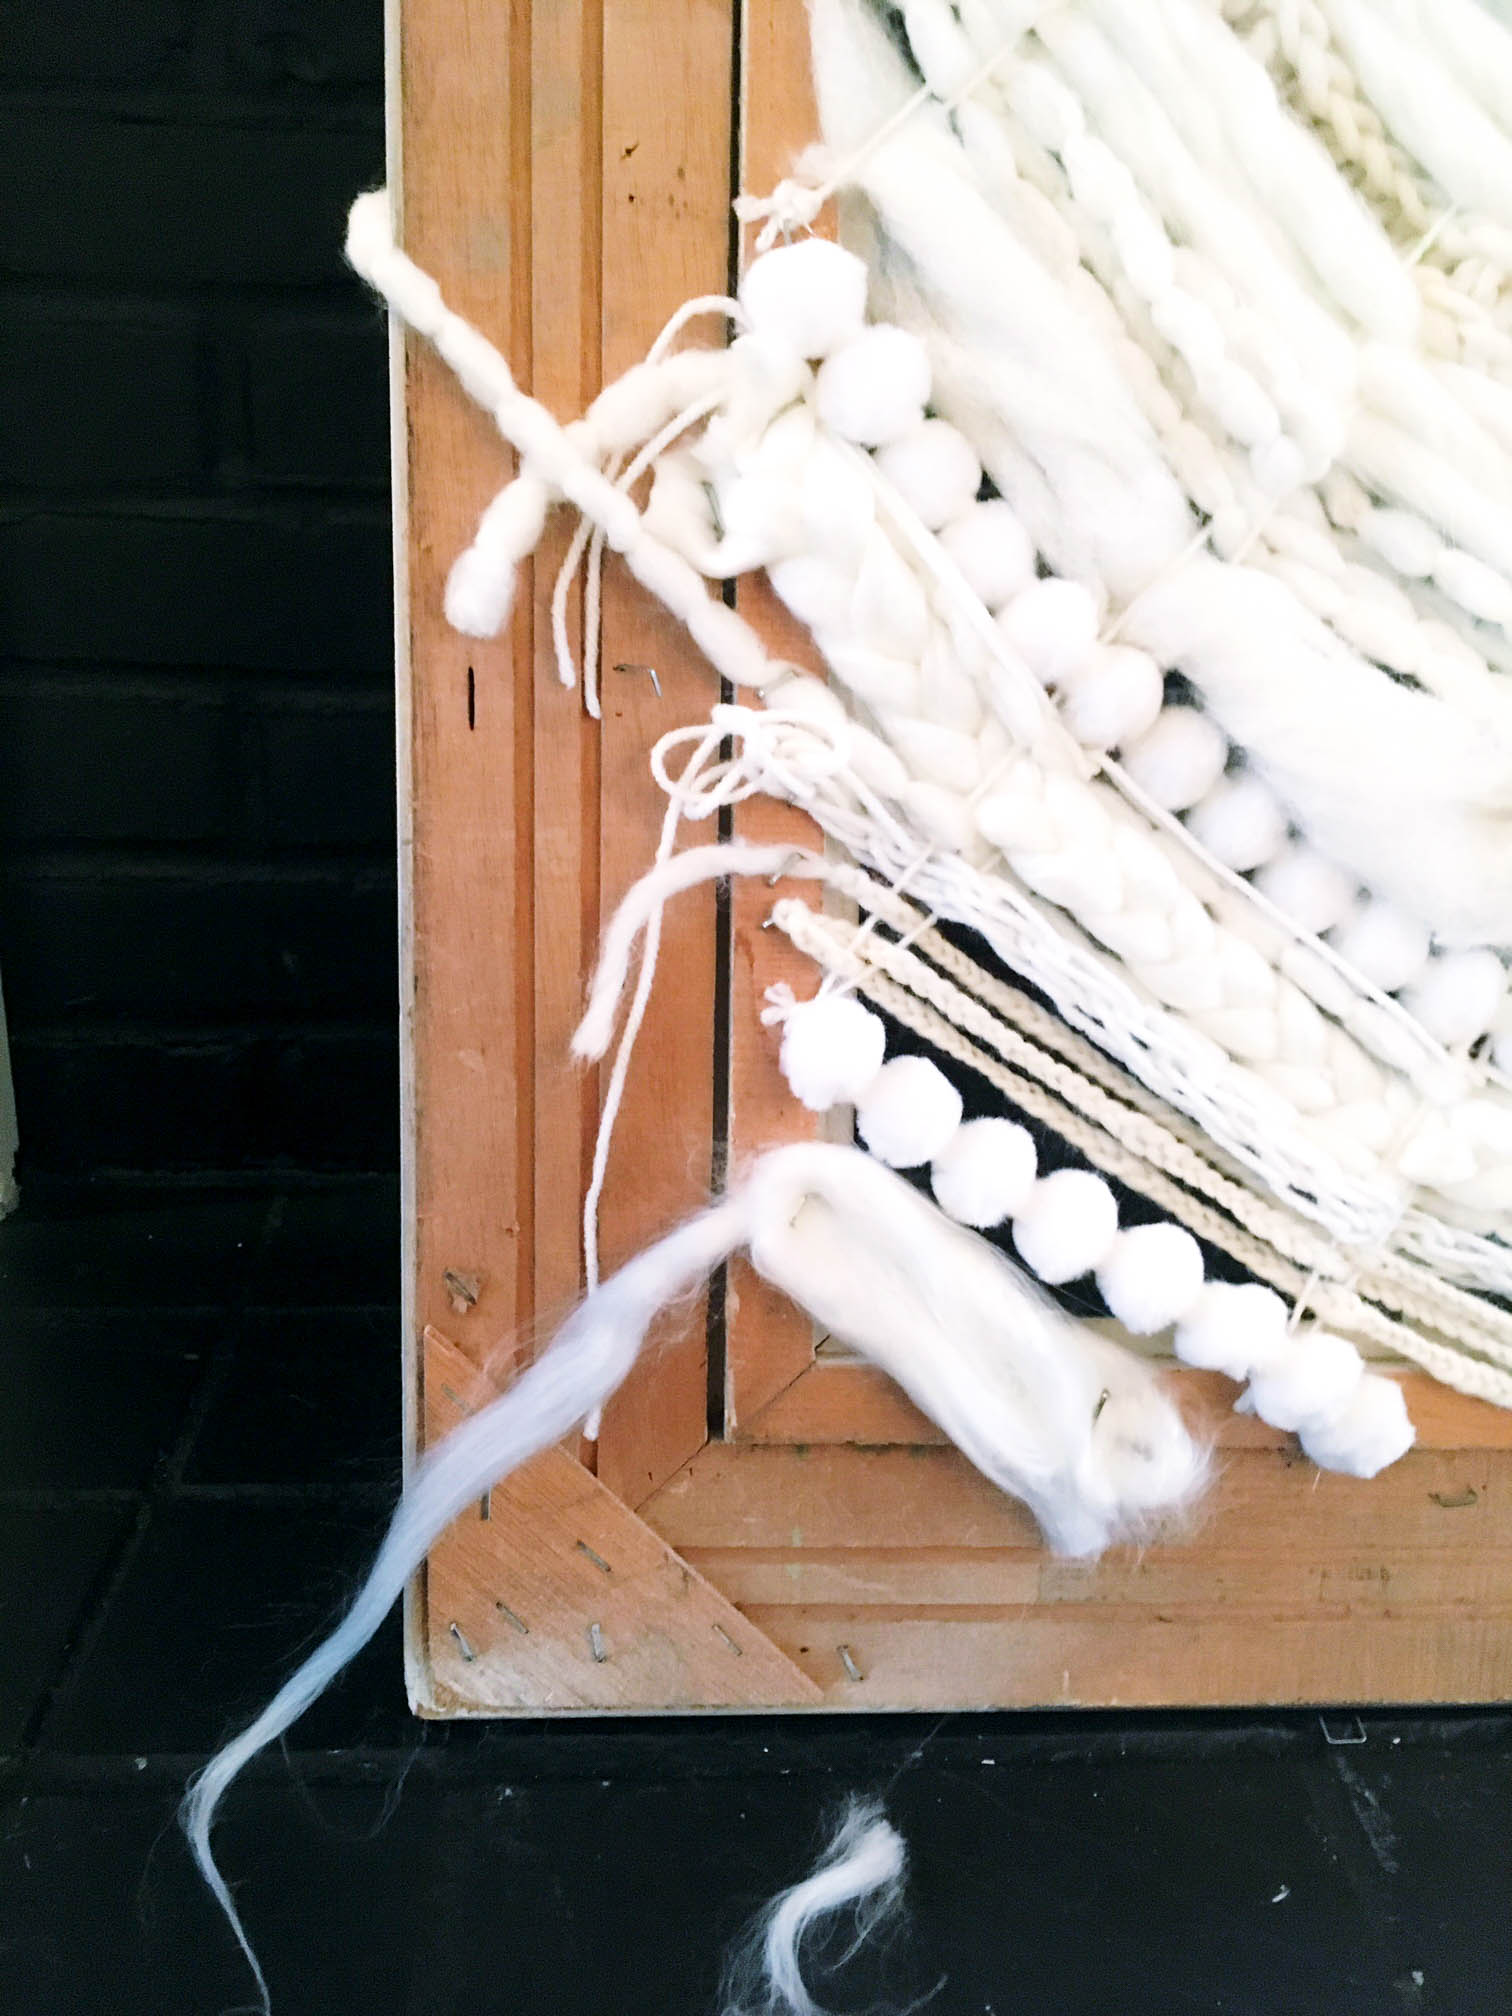
- When the weaving is complete, cut all excess threads.
- If you don’t want to be able to see the wall behind the weaving in open areas, and to prevent damage when hanging, cover the back with poster board and tape around the perimeter.
- Hang it up!
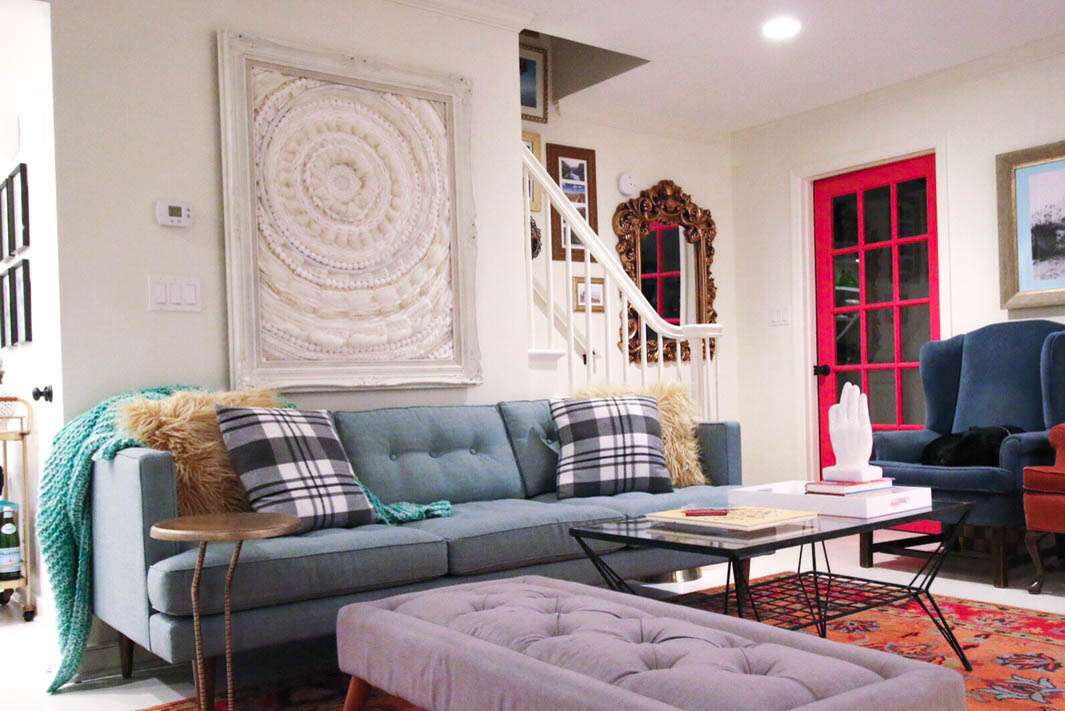
The first portion of this project was far more time consuming than this was. It didn’t take long at all, and I think it’s 1000 times better now that it’s finished!
Aa! This looks awesome, alright it does look like you need to put in a good amount of work and time, but wow it ended up looking great.
[…] may remember my post about using a hula hoop for a grand scale weaving and how I finished it off. The flowered tapestry is one I bought from Peru, soon to be hung upstairs. Adding fabric art […]
This is so creative! Looks great! x
[…] it took about an hour and little to no thought. When I made the circular weave and expanded it to make large scale woven art, I was surprised how many people commended me for “hard work” or “talent!” […]
My wife has always been crafty and especially during these stay at home days she has no taken up fibre art. I got hooked.
I too did a hoola hoop. But for the life of me I can’t figure out how you framed this. Where’s the rest of the hoola hoop? Cut off? How did the warping not all come loose? I love the fill in corners and your blog I stumbled upon through pinterest is going to thrill my wife.
Hi Wally! Thanks for stopping by! I basically suspended the hula hoop within the frame. I looped through yarns at intervals equal distance to the warp threads in the original weaving and stapled each of those to the frame. You can kind of see it in the picture of the back of the weaving, but I’d be happy to take another picture or do a video if you need better instructions!
[…] enough is the grace I give myself in my paintings. In my weavings, in my DIY projects, halloween costumes, I let “better than before” be my guide. During […]
[…] reader, you may remember it from my old midcentury modern inspired living room or when I added framed it out. Now it hangs in my master […]